# Schedule Creation for the Staff
#### **Option 1: Specific Date**
---
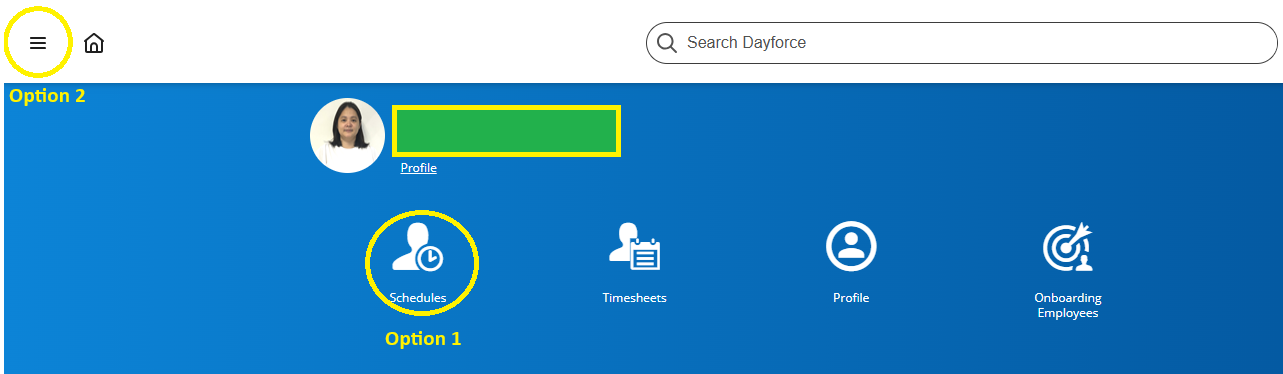
1. Option 1: Click the icon "schedule."
2. Option 2: Click the navigation or list icon.
[](https://docs.goodwindcorp.com/uploads/images/gallery/2026-04/YlHimage.png)
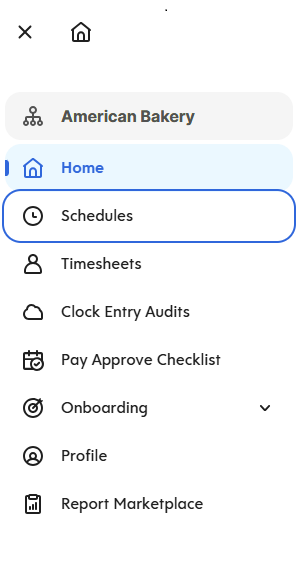
- - - For Option 2: after clicking the navigation icon, click "Schedules."
[](https://docs.goodwindcorp.com/uploads/images/gallery/2026-04/65Aimage.png)
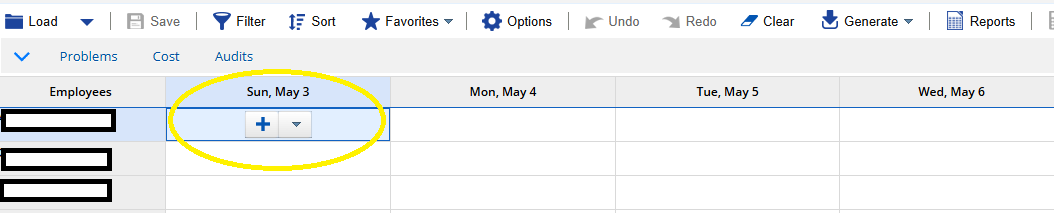
3\. Navigate to the specific date and then click the plus sign (+) icon to add a schedule.
[](https://docs.goodwindcorp.com/uploads/images/gallery/2026-04/Qp4image.png)
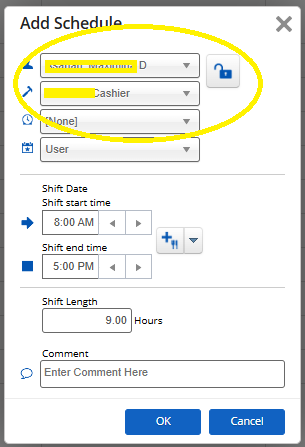
4\. Employee Name, position, employee number will automatically appear on the screen.
[](https://docs.goodwindcorp.com/uploads/images/gallery/2026-04/2n3image.png)
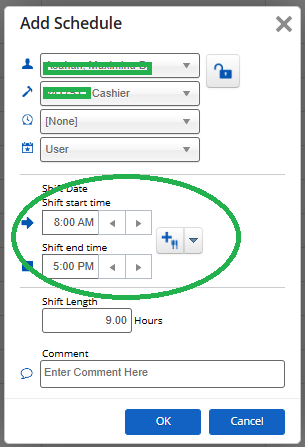
5\. Input shift start time and end time.
[](https://docs.goodwindcorp.com/uploads/images/gallery/2026-04/A2dimage.png)
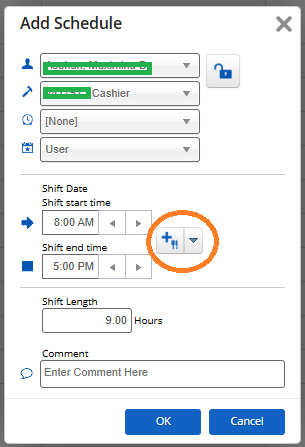
6\. Click the "plus sign with the fork and knife" icon to add break time.
[](https://docs.goodwindcorp.com/uploads/images/gallery/2026-04/V6jimage.png)
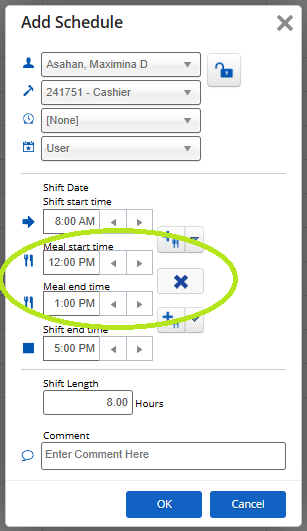
7\. Input meal start time and meal end time and then click "ok." Shift length will automatically calculate once time has been inputted.
[](https://docs.goodwindcorp.com/uploads/images/gallery/2026-04/XBnimage.png)
#### **Option 2: Generate Weekly Schedule From Previous Week**
1. Go to "Schedules."
2. Click the "Generate" dropdown list and choose "Copy Week". [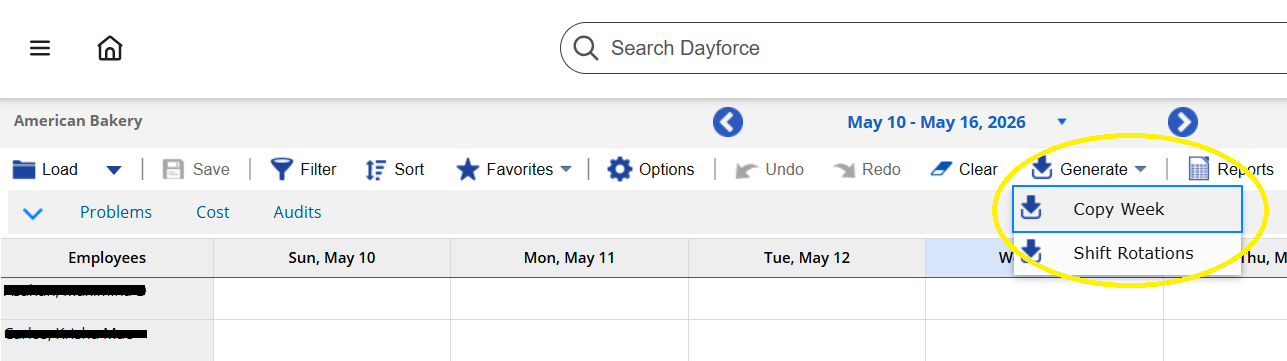](https://docs.goodwindcorp.com/uploads/images/gallery/2026-04/eR3image.png)
3. Click the "calendar" button to choose the week that will be copied for the next schedule and then click "Copy." [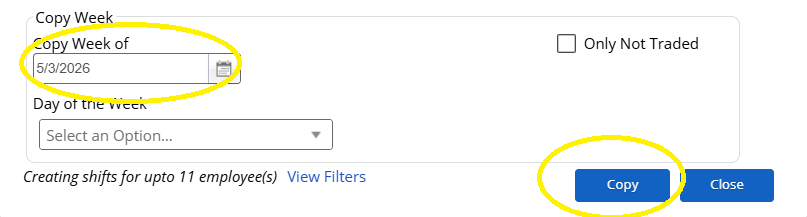](https://docs.goodwindcorp.com/uploads/images/gallery/2026-04/oH3image.png)
4. Schedule for the entire week will show on the screen. [](https://docs.goodwindcorp.com/uploads/images/gallery/2026-04/E4Aimage.png)