# Dayforce Training

# Dayforce Training - Supervisors / Managers

Supervisor/Manager Access Level

# Logging In as Manager

- How to Access Dayforce on the Laptop / Desktop 
    1. Go to the Dayforce Website at **[MyDayForce Login](https://www.dayforcehcm.com/mydayforce/login.aspx "Dayforce Website")**
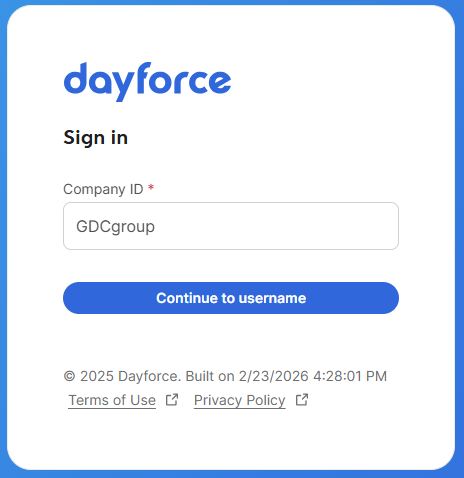
    2. Sign in by putting the Company ID: GDCGroup and then click "**continue to username**."

[![image.png](https://docs.goodwindcorp.com/uploads/images/gallery/2026-04/scaled-1680-/Prcimage.png)](https://docs.goodwindcorp.com/uploads/images/gallery/2026-04/Prcimage.png)

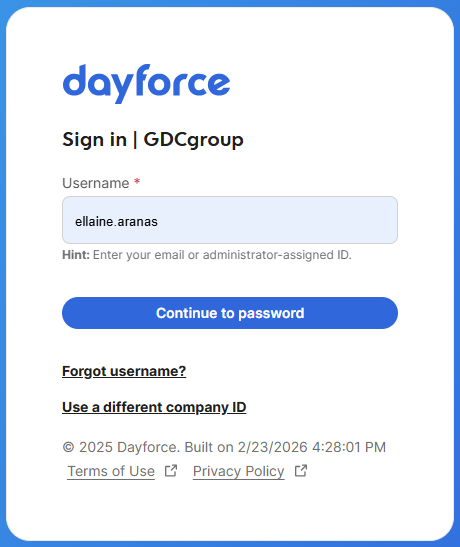
3\. Type the username: username Format: firstname.lastname and then click "continue to password."

[![image.png](https://docs.goodwindcorp.com/uploads/images/gallery/2026-04/scaled-1680-/0LXimage.png)](https://docs.goodwindcorp.com/uploads/images/gallery/2026-04/0LXimage.png)

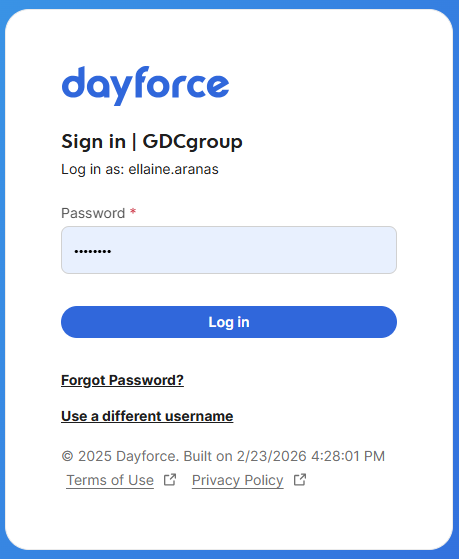
4\. Type the password set to the account and then click "Log in."

[![image.png](https://docs.goodwindcorp.com/uploads/images/gallery/2026-04/scaled-1680-/91Oimage.png)](https://docs.goodwindcorp.com/uploads/images/gallery/2026-04/91Oimage.png)

5\. Select the Role " Manager with WFM" and then click "Next."

[![image.png](https://docs.goodwindcorp.com/uploads/images/gallery/2026-04/scaled-1680-/vsCimage.png)](https://docs.goodwindcorp.com/uploads/images/gallery/2026-04/vsCimage.png)

6\. Home page will appear on the screen.

[![image.png](https://docs.goodwindcorp.com/uploads/images/gallery/2026-04/scaled-1680-/5Rqimage.png)](https://docs.goodwindcorp.com/uploads/images/gallery/2026-04/5Rqimage.png)

# Schedule Creation for the Staff

#### <span style="text-decoration: underline;">**Option 1: Specific Date**</span> 

---

1. Option 1: Click the icon "schedule."
2. Option 2: Click the navigation or list icon.

[![image.png](https://docs.goodwindcorp.com/uploads/images/gallery/2026-04/scaled-1680-/YlHimage.png)](https://docs.goodwindcorp.com/uploads/images/gallery/2026-04/YlHimage.png)

- - - For Option 2: after clicking the navigation icon, click "Schedules."

[![image.png](https://docs.goodwindcorp.com/uploads/images/gallery/2026-04/scaled-1680-/65Aimage.png)](https://docs.goodwindcorp.com/uploads/images/gallery/2026-04/65Aimage.png)

3\. Navigate to the specific date and then click the plus sign (+) icon to add a schedule.

[![image.png](https://docs.goodwindcorp.com/uploads/images/gallery/2026-04/scaled-1680-/Qp4image.png)](https://docs.goodwindcorp.com/uploads/images/gallery/2026-04/Qp4image.png)

4\. Employee Name, position, employee number will automatically appear on the screen.

[![image.png](https://docs.goodwindcorp.com/uploads/images/gallery/2026-04/scaled-1680-/2n3image.png)](https://docs.goodwindcorp.com/uploads/images/gallery/2026-04/2n3image.png)

5\. Input shift start time and end time.

 [![image.png](https://docs.goodwindcorp.com/uploads/images/gallery/2026-04/scaled-1680-/A2dimage.png)](https://docs.goodwindcorp.com/uploads/images/gallery/2026-04/A2dimage.png)

6\. Click the "plus sign with the fork and knife" icon to add break time.

[![image.png](https://docs.goodwindcorp.com/uploads/images/gallery/2026-04/scaled-1680-/V6jimage.png)](https://docs.goodwindcorp.com/uploads/images/gallery/2026-04/V6jimage.png)

7\. Input meal start time and meal end time and then click "ok." Shift length will automatically calculate once time has been inputted.

[![image.png](https://docs.goodwindcorp.com/uploads/images/gallery/2026-04/scaled-1680-/XBnimage.png)](https://docs.goodwindcorp.com/uploads/images/gallery/2026-04/XBnimage.png)

#### <span style="text-decoration: underline;">**Option 2: Generate Weekly Schedule From Previous Week**</span>

1. Go to "Schedules."
2. Click the "Generate" dropdown list and choose "Copy Week". [![image.png](https://docs.goodwindcorp.com/uploads/images/gallery/2026-04/scaled-1680-/eR3image.png)](https://docs.goodwindcorp.com/uploads/images/gallery/2026-04/eR3image.png)
3. Click the "calendar" button to choose the week that will be copied for the next schedule and then click "Copy." [![image.png](https://docs.goodwindcorp.com/uploads/images/gallery/2026-04/scaled-1680-/oH3image.png)](https://docs.goodwindcorp.com/uploads/images/gallery/2026-04/oH3image.png)
4. Schedule for the entire week will show on the screen. [![image.png](https://docs.goodwindcorp.com/uploads/images/gallery/2026-04/scaled-1680-/E4Aimage.png)](https://docs.goodwindcorp.com/uploads/images/gallery/2026-04/E4Aimage.png)

# Authorizing Timesheet Records

#### <span style="text-decoration: underline;">**Auhtorizing of Late in / Late out**</span>

1. Option 1: Click the timesheet icon.

 Option 2: Click the navigation / list icon.

[![image.png](https://docs.goodwindcorp.com/uploads/images/gallery/2026-04/scaled-1680-/GNkimage.png)](https://docs.goodwindcorp.com/uploads/images/gallery/2026-04/GNkimage.png)

For option 2: after clicking the navigation / list icon, choose "timesheets" in the dropdown list.

[![image.png](https://docs.goodwindcorp.com/uploads/images/gallery/2026-04/scaled-1680-/gWNimage.png)](https://docs.goodwindcorp.com/uploads/images/gallery/2026-04/gWNimage.png)

2\. Go to the specific date in the employee's name to approve late in / late out then click the "pencil" icon.

[![image.png](https://docs.goodwindcorp.com/uploads/images/gallery/2026-04/scaled-1680-/j0ximage.png)](https://docs.goodwindcorp.com/uploads/images/gallery/2026-04/j0ximage.png)

3\. To authorize late in, click the L-In dropdown list, choose "L-In OK."

[![image.png](https://docs.goodwindcorp.com/uploads/images/gallery/2026-04/scaled-1680-/Qvtimage.png)](https://docs.goodwindcorp.com/uploads/images/gallery/2026-04/Qvtimage.png)

4\. To authorize Late out, click the L-out Dropdown list and choose "L-Out OK-Apprvd."

[![image.png](https://docs.goodwindcorp.com/uploads/images/gallery/2026-04/scaled-1680-/on6image.png)](https://docs.goodwindcorp.com/uploads/images/gallery/2026-04/on6image.png)

5\. Input justification in approving late in / late out and then click "OK."

[![image.png](https://docs.goodwindcorp.com/uploads/images/gallery/2026-04/scaled-1680-/JbIimage.png)](https://docs.goodwindcorp.com/uploads/images/gallery/2026-04/JbIimage.png)

#### <span style="text-decoration: underline;">**Authorizing Employee's shift**</span>

- **For One Single Shift**
    1. Go to the specific employee and click date to authorize a shift. Specific box date will turn to blue. [![image.png](https://docs.goodwindcorp.com/uploads/images/gallery/2026-04/scaled-1680-/lKJimage.png)](https://docs.goodwindcorp.com/uploads/images/gallery/2026-04/lKJimage.png)
    2. Click the icon "Authorize." [![image.png](https://docs.goodwindcorp.com/uploads/images/gallery/2026-04/scaled-1680-/L5Dimage.png)](https://docs.goodwindcorp.com/uploads/images/gallery/2026-04/L5Dimage.png)
    3. A brown person with a check mark on top will appear once shift has been authorized. [![image.png](https://docs.goodwindcorp.com/uploads/images/gallery/2026-04/scaled-1680-/lHfimage.png)](https://docs.goodwindcorp.com/uploads/images/gallery/2026-04/lHfimage.png)
- **For One Week Shift**
    1. Click the employee's name to highlight the entire week. [![image.png](https://docs.goodwindcorp.com/uploads/images/gallery/2026-04/scaled-1680-/cGQimage.png)](https://docs.goodwindcorp.com/uploads/images/gallery/2026-04/cGQimage.png)
    2. Click the icon "Authorize." [![image.png](https://docs.goodwindcorp.com/uploads/images/gallery/2026-04/scaled-1680-/HsHimage.png)](https://docs.goodwindcorp.com/uploads/images/gallery/2026-04/HsHimage.png)
    3. A brown person with a check mark on top will appear on each shifts once shift has been authorized. [![image.png](https://docs.goodwindcorp.com/uploads/images/gallery/2026-04/scaled-1680-/F5Rimage.png)](https://docs.goodwindcorp.com/uploads/images/gallery/2026-04/F5Rimage.png)

# Time Off Request Entry

1. Go to Approval. [![image.png](https://docs.goodwindcorp.com/uploads/images/gallery/2026-04/scaled-1680-/E9Aimage.png)](https://docs.goodwindcorp.com/uploads/images/gallery/2026-04/E9Aimage.png)
2. On the Approval toolstrip, Click "Request New Time Off." [![image.png](https://docs.goodwindcorp.com/uploads/images/gallery/2026-04/scaled-1680-/n8Jimage.png)](https://docs.goodwindcorp.com/uploads/images/gallery/2026-04/n8Jimage.png)
3. On the employee dropdown list, click the employee's name. [![image.png](https://docs.goodwindcorp.com/uploads/images/gallery/2026-04/scaled-1680-/q8Zimage.png)](https://docs.goodwindcorp.com/uploads/images/gallery/2026-04/q8Zimage.png)
4. Select Reason on the dropdonw list, input start and end date and click Type of request. [![image.png](https://docs.goodwindcorp.com/uploads/images/gallery/2026-04/scaled-1680-/UYzimage.png)](https://docs.goodwindcorp.com/uploads/images/gallery/2026-04/UYzimage.png)
5. Click "Save."  
    [![image.png](https://docs.goodwindcorp.com/uploads/images/gallery/2026-04/scaled-1680-/iCXimage.png)](https://docs.goodwindcorp.com/uploads/images/gallery/2026-04/iCXimage.png)
6. If Leave balance is not enough, an error message will appear on the screen. Employee should have sufficient leave balance in order for the transaction to go through. [![image.png](https://docs.goodwindcorp.com/uploads/images/gallery/2026-04/scaled-1680-/4F9image.png)](https://docs.goodwindcorp.com/uploads/images/gallery/2026-04/4F9image.png)

# Leave Approvals

#### <span style="text-decoration: underline;">**OPTION 1:**</span>

1\. Click the "Approval" icon.

[![image.png](https://docs.goodwindcorp.com/uploads/images/gallery/2026-04/scaled-1680-/Bkfimage.png)](https://docs.goodwindcorp.com/uploads/images/gallery/2026-04/Bkfimage.png)

2\. Click "Action" to view pending leave approvals.

[![image.png](https://docs.goodwindcorp.com/uploads/images/gallery/2026-04/scaled-1680-/bljimage.png)](https://docs.goodwindcorp.com/uploads/images/gallery/2026-04/bljimage.png)

3\. Click the leave request that you want to open.

[![image.png](https://docs.goodwindcorp.com/uploads/images/gallery/2026-04/scaled-1680-/KmFimage.png)](https://docs.goodwindcorp.com/uploads/images/gallery/2026-04/KmFimage.png)

4\. Click the "Approve" icon to grant the leave request.

[![image.png](https://docs.goodwindcorp.com/uploads/images/gallery/2026-04/scaled-1680-/TXMimage.png)](https://docs.goodwindcorp.com/uploads/images/gallery/2026-04/TXMimage.png)

5\. If Denied , click the " Manager comment" to input reason of denying the request and then click the" Deny" icon.

[![image.png](https://docs.goodwindcorp.com/uploads/images/gallery/2026-04/scaled-1680-/9n6image.png)](https://docs.goodwindcorp.com/uploads/images/gallery/2026-04/9n6image.png)

#### <span style="text-decoration: underline;">**OPTION 2:**</span>

1\. Click the "Approval" icon.

[![image.png](https://docs.goodwindcorp.com/uploads/images/gallery/2026-04/scaled-1680-/Bkfimage.png)](https://docs.goodwindcorp.com/uploads/images/gallery/2026-04/Bkfimage.png)

2\. Click the "Approve" icon to grant the leave request.

[![image.png](https://docs.goodwindcorp.com/uploads/images/gallery/2026-04/scaled-1680-/sULimage.png)](https://docs.goodwindcorp.com/uploads/images/gallery/2026-04/sULimage.png)

5\. If Denied , click the " Manager comment" to input reason of denying the request then click the" Deny" icon.

[![image.png](https://docs.goodwindcorp.com/uploads/images/gallery/2026-04/scaled-1680-/9n6image.png)](https://docs.goodwindcorp.com/uploads/images/gallery/2026-04/9n6image.png)

# Dayforce Training - End Users(Employees)

Employee Access Levels

# View Shifts / Schedule

#### <span style="text-decoration: underline;">**Option 1: Using Laptop / Desktop**</span>

1\. Log in to Dayforce at **[MyDayForce Login](https://www.dayforcehcm.com/mydayforce/login.aspx "Dayforce Website")**

<table border="1" id="bkmrk-company-id%3A-gdcgroup" style="border-collapse: collapse; width: 100%; height: 306.05px;"><colgroup><col style="width: 33.3333%;"></col><col style="width: 33.3333%;"></col><col style="width: 33.3333%;"></col></colgroup><tbody><tr style="height: 306.05px;"><td style="height: 306.05px;">Company ID: GDCgroup

[![image.png](https://docs.goodwindcorp.com/uploads/images/gallery/2026-04/scaled-1680-/Prcimage.png)](https://docs.goodwindcorp.com/uploads/images/gallery/2026-04/Prcimage.png)

</td><td style="height: 306.05px;">Username: Firstname.Lastname

[![image.png](https://docs.goodwindcorp.com/uploads/images/gallery/2026-04/scaled-1680-/kXjimage.png)](https://docs.goodwindcorp.com/uploads/images/gallery/2026-04/kXjimage.png)

</td><td style="height: 306.05px;">Password:

[![image.png](https://docs.goodwindcorp.com/uploads/images/gallery/2026-04/scaled-1680-/BCRimage.png)](https://docs.goodwindcorp.com/uploads/images/gallery/2026-04/BCRimage.png)

</td></tr></tbody></table>

2\. Click the "calendar" icon.

[![image.png](https://docs.goodwindcorp.com/uploads/images/gallery/2026-04/scaled-1680-/mReimage.png)](https://docs.goodwindcorp.com/uploads/images/gallery/2026-04/mReimage.png)

3\. Calendar with the schedule will appear on the screen for the specified month.

[![image.png](https://docs.goodwindcorp.com/uploads/images/gallery/2026-04/scaled-1680-/9LKimage.png)](https://docs.goodwindcorp.com/uploads/images/gallery/2026-04/9LKimage.png)

a. To view by week, click the Calendar dropdown list and choose "week."

 [![image.png](https://docs.goodwindcorp.com/uploads/images/gallery/2026-04/scaled-1680-/2LCimage.png)](https://docs.goodwindcorp.com/uploads/images/gallery/2026-04/2LCimage.png)

b. Schedule for the specified week will appear on the screen.

[![image.png](https://docs.goodwindcorp.com/uploads/images/gallery/2026-04/scaled-1680-/Nfiimage.png)](https://docs.goodwindcorp.com/uploads/images/gallery/2026-04/Nfiimage.png)

c. To view by day. click the calendar dropdown list and choose "calendar day."

 [![image.png](https://docs.goodwindcorp.com/uploads/images/gallery/2026-04/scaled-1680-/2LCimage.png)](https://docs.goodwindcorp.com/uploads/images/gallery/2026-04/2LCimage.png)

d. Schedule for the specified day will appear on the screen.

[![image.png](https://docs.goodwindcorp.com/uploads/images/gallery/2026-04/scaled-1680-/FHTimage.png)](https://docs.goodwindcorp.com/uploads/images/gallery/2026-04/FHTimage.png)

#### <span style="text-decoration: underline;">**Option 2: Phone Device**</span>

1\. Download the Dayforce mobile application.

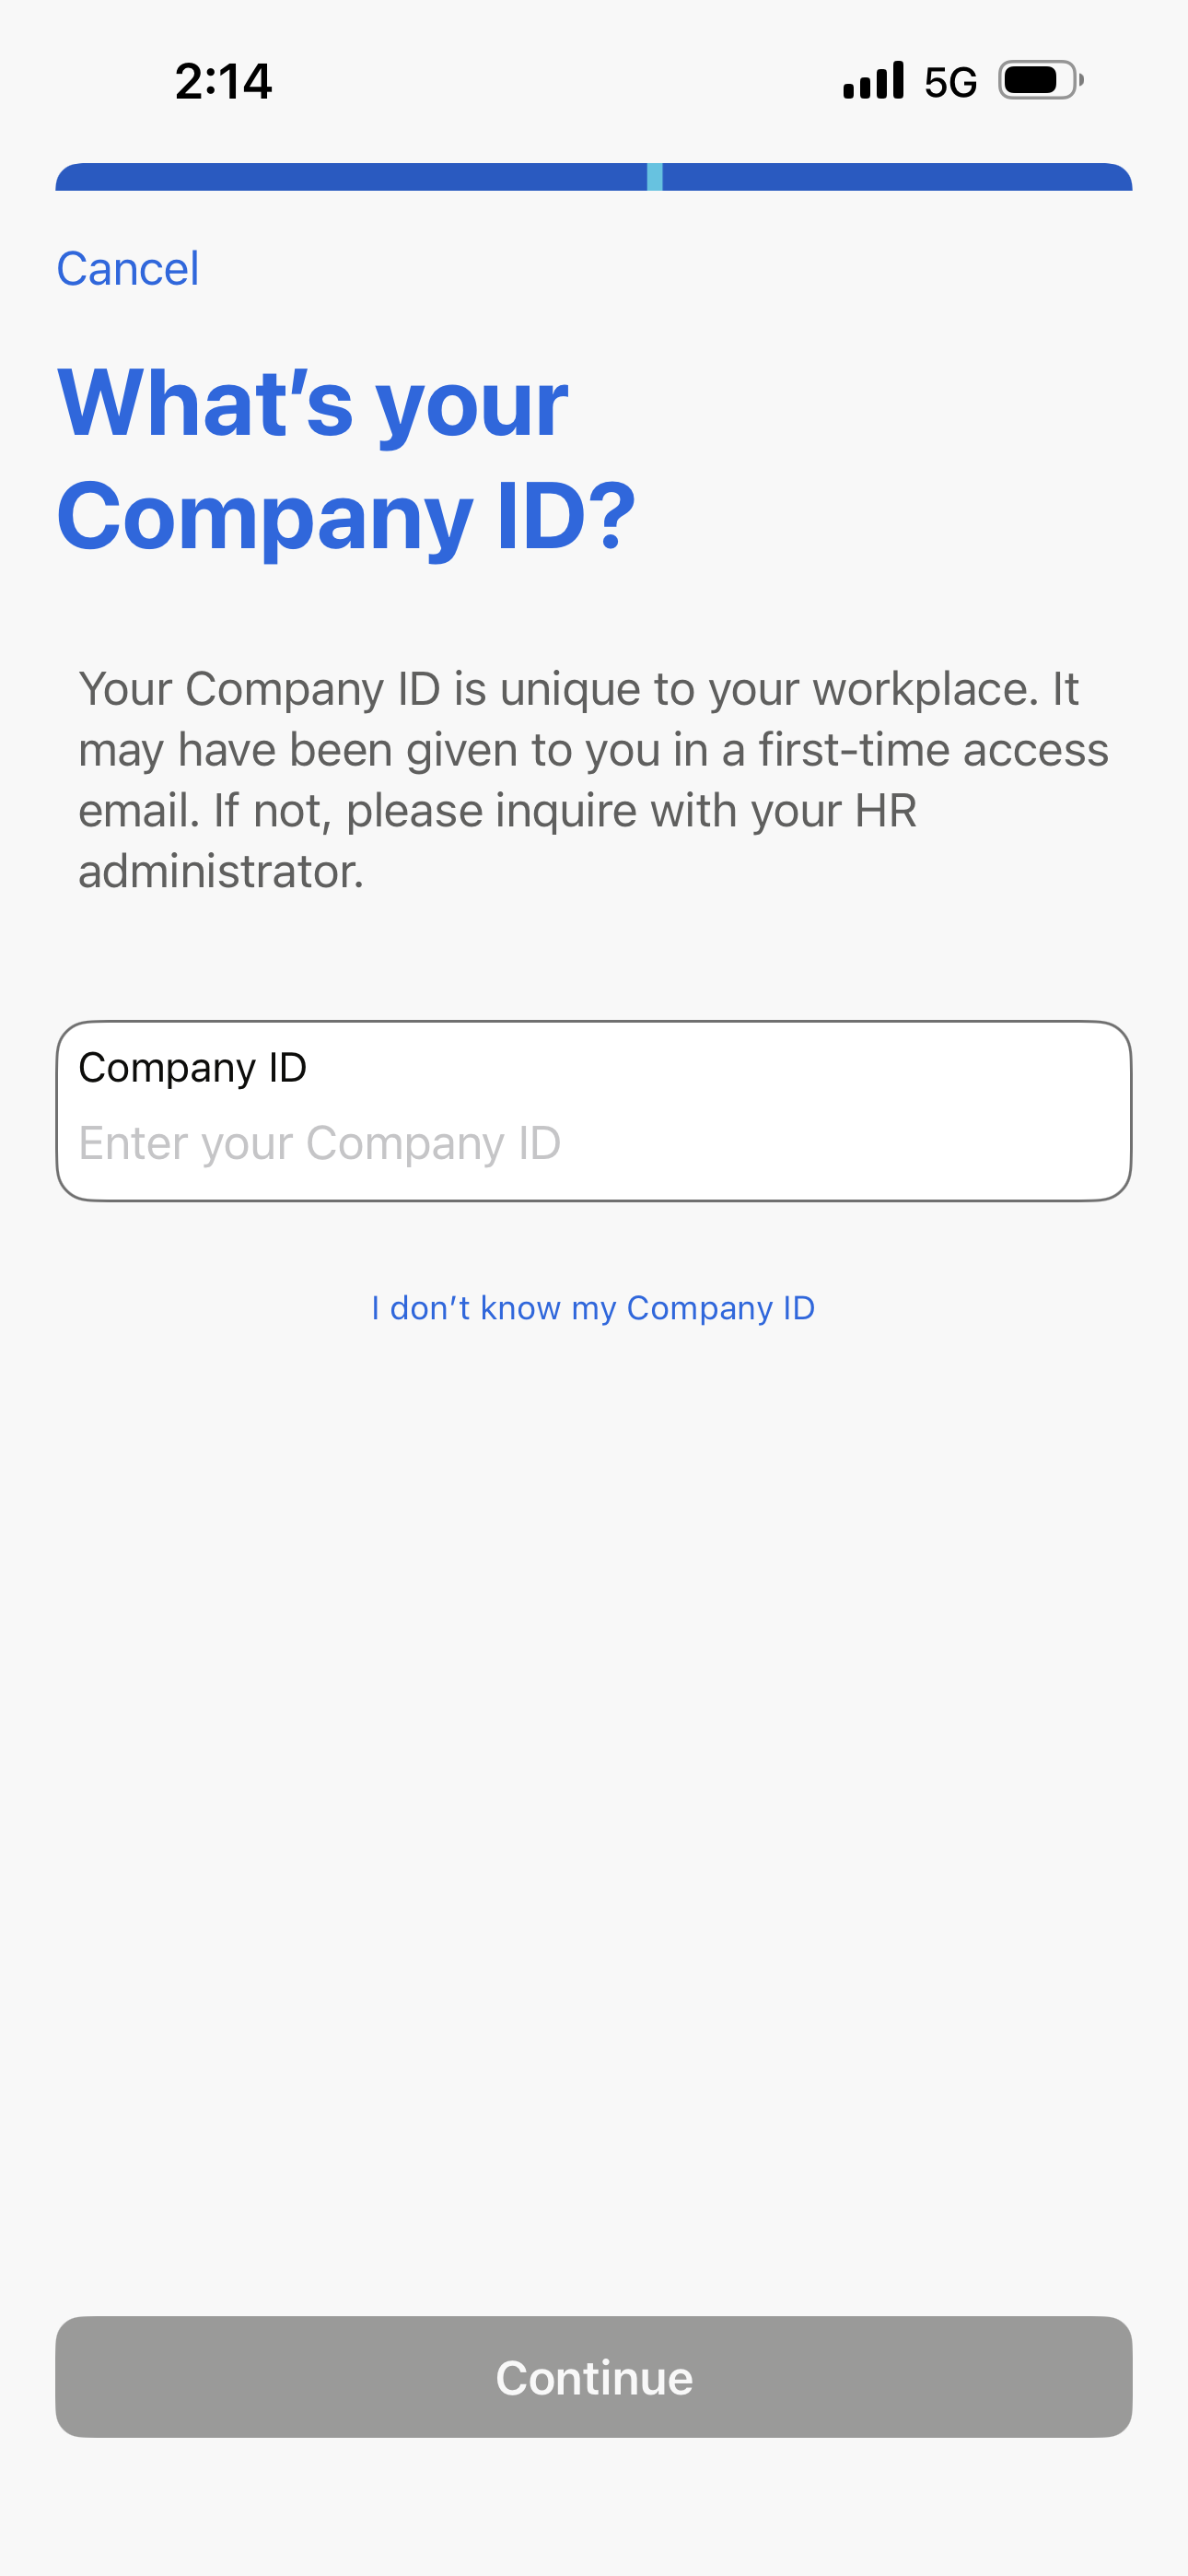
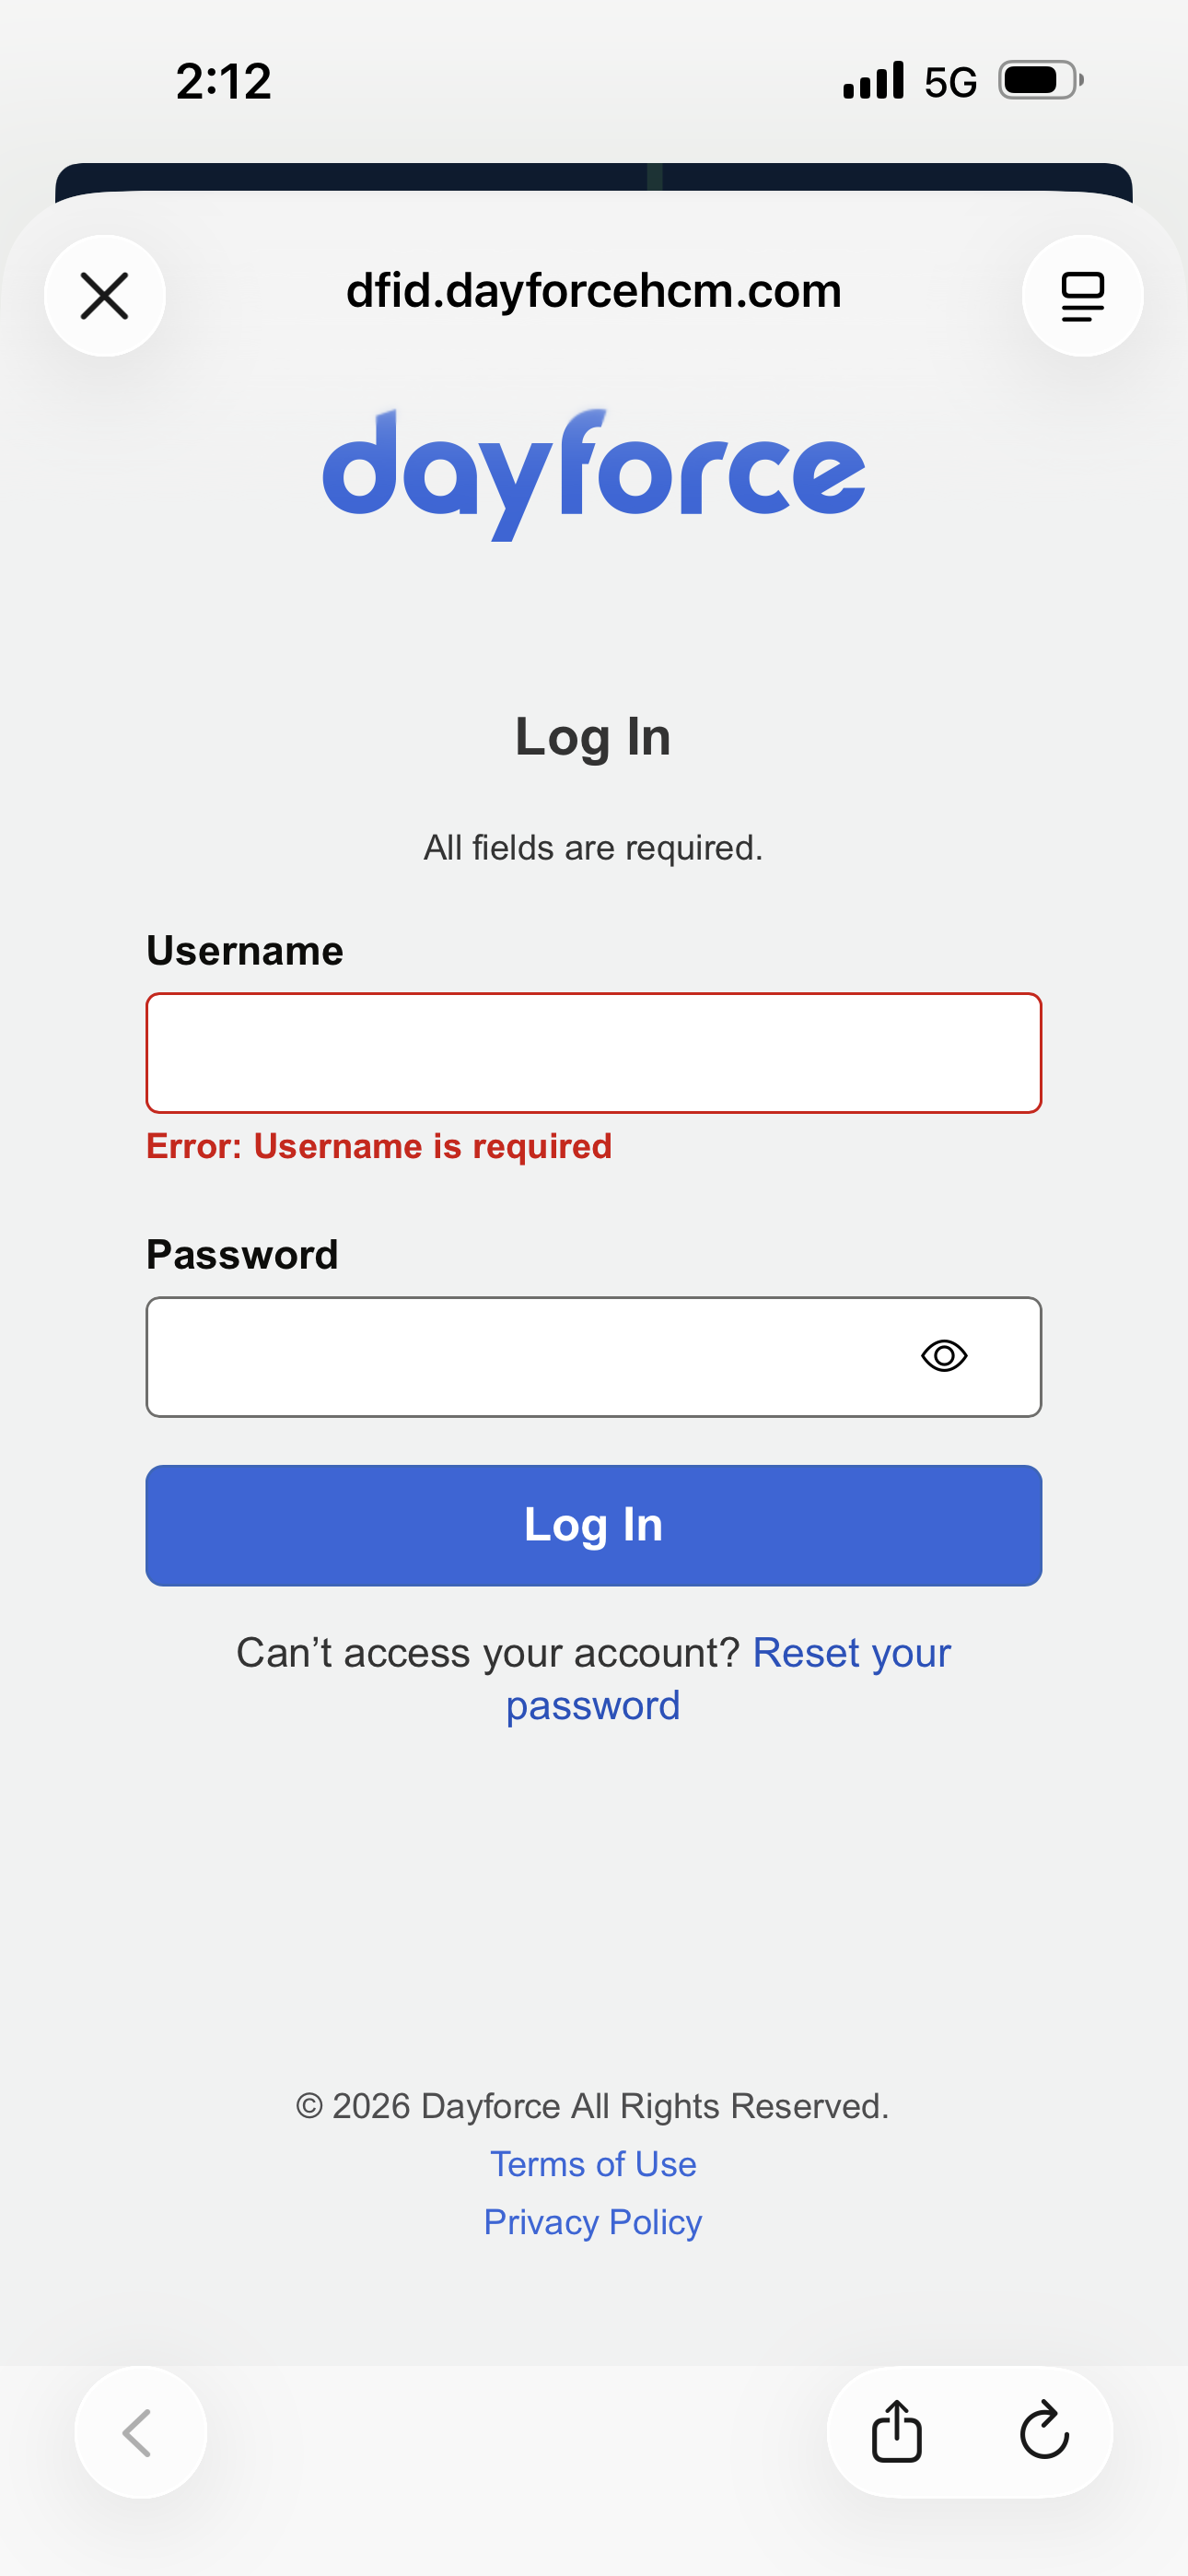
2\. Click the Dayforce mobile application and input the following:

<table border="1" class="align-center" id="bkmrk-company-id%3A-gdcgroup-1" style="border-collapse: collapse; width: 67.2619%; height: 333px;"><colgroup><col style="width: 50.0614%;"></col><col style="width: 50.0614%;"></col></colgroup><tbody><tr><td>Company ID: GDCgroup

[![Dayforce 3.png](https://docs.goodwindcorp.com/uploads/images/gallery/2026-04/scaled-1680-/dayforce-3.png)](https://docs.goodwindcorp.com/uploads/images/gallery/2026-04/dayforce-3.png)

</td><td>Username: firstname.lastname

Password: \*\*\*\*\*\*\*\*\*\*

[![Dayforce 1.png](https://docs.goodwindcorp.com/uploads/images/gallery/2026-04/scaled-1680-/dayforce-1.png)](https://docs.goodwindcorp.com/uploads/images/gallery/2026-04/dayforce-1.png)
</td></tr></tbody></table>

3\. Home page will appear on the screen.[![Dayforce4.png](https://docs.goodwindcorp.com/uploads/images/gallery/2026-04/scaled-1680-/dayforce4.png)](https://docs.goodwindcorp.com/uploads/images/gallery/2026-04/dayforce4.png)

4\. Click the "calendar" icon.

[![image.png](https://docs.goodwindcorp.com/uploads/images/gallery/2026-04/scaled-1680-/Jc3image.png)](https://docs.goodwindcorp.com/uploads/images/gallery/2026-04/Jc3image.png)

5\. Shift/Schedule per day will appear on the screen.

[![image.png](https://docs.goodwindcorp.com/uploads/images/gallery/2026-04/scaled-1680-/NdYimage.png)](https://docs.goodwindcorp.com/uploads/images/gallery/2026-04/NdYimage.png)

# Submitting Leave Requests

#### <span style="text-decoration: underline;">**Option 1: Using Laptop/Desktop**</span>

1\. Log in to Dayforce at **[MyDayForce Login](https://www.dayforcehcm.com/mydayforce/login.aspx "Dayforce Website")**

<table border="1" id="bkmrk-company-id%3A-gdcgroup"><colgroup><col></col><col></col><col></col></colgroup><tbody><tr><td>Company ID: GDCgroup

[![image.png](https://docs.goodwindcorp.com/uploads/images/gallery/2026-04/scaled-1680-/Prcimage.png)](https://docs.goodwindcorp.com/uploads/images/gallery/2026-04/Prcimage.png)

</td><td>Username: Firstname.Lastname

[![image.png](https://docs.goodwindcorp.com/uploads/images/gallery/2026-04/scaled-1680-/kXjimage.png)](https://docs.goodwindcorp.com/uploads/images/gallery/2026-04/kXjimage.png)

</td><td>Password:

[![image.png](https://docs.goodwindcorp.com/uploads/images/gallery/2026-04/scaled-1680-/BCRimage.png)](https://docs.goodwindcorp.com/uploads/images/gallery/2026-04/BCRimage.png)

</td></tr></tbody></table>

1. Click the "Time Away List" icon. [![image.png](https://docs.goodwindcorp.com/uploads/images/gallery/2026-04/scaled-1680-/ZSDimage.png)](https://docs.goodwindcorp.com/uploads/images/gallery/2026-04/ZSDimage.png)
2. Click the "Request Time Off" icon. [![image.png](https://docs.goodwindcorp.com/uploads/images/gallery/2026-04/scaled-1680-/M2Uimage.png)](https://docs.goodwindcorp.com/uploads/images/gallery/2026-04/M2Uimage.png)
3. Select Reason, start Date, End date and Type of Request. [![image.png](https://docs.goodwindcorp.com/uploads/images/gallery/2026-04/scaled-1680-/Aw1image.png)](https://docs.goodwindcorp.com/uploads/images/gallery/2026-04/Aw1image.png)
4. Employee can input in the employee comment section the reason or purpose of the leave request and then click "Submit." [![image.png](https://docs.goodwindcorp.com/uploads/images/gallery/2026-04/scaled-1680-/jPBimage.png)](https://docs.goodwindcorp.com/uploads/images/gallery/2026-04/jPBimage.png)
5. Employee will receive an email once leave request has been approved. [![image.png](https://docs.goodwindcorp.com/uploads/images/gallery/2026-04/scaled-1680-/VUximage.png)](https://docs.goodwindcorp.com/uploads/images/gallery/2026-04/VUximage.png)

#### <span style="text-decoration: underline;">**Option 2: Using Phone Device**</span>

1. Click the Dayforce application in the phone.
2. Click the "GDCgroup" icon. [![image.png](https://docs.goodwindcorp.com/uploads/images/gallery/2026-04/scaled-1680-/fqpimage.png)](https://docs.goodwindcorp.com/uploads/images/gallery/2026-04/fqpimage.png)
    
     3. Log in to the account by typing the username and password and then click "Log In."

[![Dayforce 1.png](https://docs.goodwindcorp.com/uploads/images/gallery/2026-04/scaled-1680-/dayforce-1.png)](https://docs.goodwindcorp.com/uploads/images/gallery/2026-04/dayforce-1.png)

4\. Click " Time Away."

[![image.png](https://docs.goodwindcorp.com/uploads/images/gallery/2026-04/scaled-1680-/7Rlimage.png)](https://docs.goodwindcorp.com/uploads/images/gallery/2026-04/7Rlimage.png)

5\. Check Leave balances, If with sufficient balance, click "New Request."

[![image.png](https://docs.goodwindcorp.com/uploads/images/gallery/2026-04/scaled-1680-/eoCimage.png)](https://docs.goodwindcorp.com/uploads/images/gallery/2026-04/eoCimage.png)

6\. Select a reason for the request.

[![image.png](https://docs.goodwindcorp.com/uploads/images/gallery/2026-04/scaled-1680-/Osrimage.png)](https://docs.goodwindcorp.com/uploads/images/gallery/2026-04/Osrimage.png)

7\. Input Duration (Full or Partial), Start Date, End Date and purpose of the request in the comment section then click "Next."

[![image.png](https://docs.goodwindcorp.com/uploads/images/gallery/2026-04/scaled-1680-/rK6image.png)](https://docs.goodwindcorp.com/uploads/images/gallery/2026-04/rK6image.png)

8\. Review the details. Input additional comment if needed then click "Submit."

Note: Remaining Balance if approved will show in the screen.

[![image.png](https://docs.goodwindcorp.com/uploads/images/gallery/2026-04/scaled-1680-/2drimage.png)](https://docs.goodwindcorp.com/uploads/images/gallery/2026-04/2drimage.png)

9\. Approver will receive an email notification.

[![image.png](https://docs.goodwindcorp.com/uploads/images/gallery/2026-04/scaled-1680-/zroimage.png)](https://docs.goodwindcorp.com/uploads/images/gallery/2026-04/zroimage.png)

####  

# View / Print Check Stubs

#### <span style="text-decoration: underline;">**Option 1: Using Laptop / Desktop**</span>

1\. Log in to Dayforce at **[MyDayForce Login](https://www.dayforcehcm.com/mydayforce/login.aspx "Dayforce Website")**

<table border="1" id="bkmrk-company-id%3A-gdcgroup" style="width: 89.4048%;"><colgroup><col style="width: 36.3903%;"></col><col style="width: 32.3914%;"></col><col style="width: 31.325%;"></col></colgroup><tbody><tr><td>Company ID: GDCgroup

[![image.png](https://docs.goodwindcorp.com/uploads/images/gallery/2026-04/scaled-1680-/Prcimage.png)](https://docs.goodwindcorp.com/uploads/images/gallery/2026-04/Prcimage.png)

</td><td>Username: Firstname.Lastname

[![image.png](https://docs.goodwindcorp.com/uploads/images/gallery/2026-04/scaled-1680-/kXjimage.png)](https://docs.goodwindcorp.com/uploads/images/gallery/2026-04/kXjimage.png)

</td><td>Password:

[![image.png](https://docs.goodwindcorp.com/uploads/images/gallery/2026-04/scaled-1680-/BCRimage.png)](https://docs.goodwindcorp.com/uploads/images/gallery/2026-04/BCRimage.png)

</td></tr></tbody></table>

2\. Click the "Earnings" icon in the home screen.

[![image.png](https://docs.goodwindcorp.com/uploads/images/gallery/2026-04/scaled-1680-/Y0nimage.png)](https://docs.goodwindcorp.com/uploads/images/gallery/2026-04/Y0nimage.png)

3\. Click the specific month and choose the specific check stub.

[![image.png](https://docs.goodwindcorp.com/uploads/images/gallery/2026-04/scaled-1680-/ZDbimage.png)](https://docs.goodwindcorp.com/uploads/images/gallery/2026-04/ZDbimage.png)

4\. Check stub will show on the screen.

[![image.png](https://docs.goodwindcorp.com/uploads/images/gallery/2026-04/scaled-1680-/k2kimage.png)](https://docs.goodwindcorp.com/uploads/images/gallery/2026-04/k2kimage.png)

5\. To print, click the "Print" icon.

[![image.png](https://docs.goodwindcorp.com/uploads/images/gallery/2026-04/scaled-1680-/lAoimage.png)](https://docs.goodwindcorp.com/uploads/images/gallery/2026-04/lAoimage.png)

6\. Click "Print."

[![image.png](https://docs.goodwindcorp.com/uploads/images/gallery/2026-04/scaled-1680-/USSimage.png)](https://docs.goodwindcorp.com/uploads/images/gallery/2026-04/USSimage.png)

7\. To save in PDF, Click "Print", change destination to "Save to PDF" and then click "Save."

[![image.png](https://docs.goodwindcorp.com/uploads/images/gallery/2026-04/scaled-1680-/57Ximage.png)](https://docs.goodwindcorp.com/uploads/images/gallery/2026-04/57Ximage.png)

Note. Printing of check stubs can only be done using laptop/desktop.

#### <span style="text-decoration: underline;">**Option 2: Using Phone Device**</span>

1. Click the Dayforce application in the phone.
2. Click the "GDCgroup" icon. [![image.png](https://docs.goodwindcorp.com/uploads/images/gallery/2026-04/scaled-1680-/fqpimage.png)](https://docs.goodwindcorp.com/uploads/images/gallery/2026-04/fqpimage.png)
    
     3. Log in to the account by typing the username and password and then click "Log In."

[![Dayforce 1.png](https://docs.goodwindcorp.com/uploads/images/gallery/2026-04/scaled-1680-/dayforce-1.png)](https://docs.goodwindcorp.com/uploads/images/gallery/2026-04/dayforce-1.png)

4\. On the Home screen, click "Earnings."

[![image.png](https://docs.goodwindcorp.com/uploads/images/gallery/2026-04/scaled-1680-/wrDimage.png)](https://docs.goodwindcorp.com/uploads/images/gallery/2026-04/wrDimage.png)

5\. Click the specific date to view the check stub,

[![image.png](https://docs.goodwindcorp.com/uploads/images/gallery/2026-04/scaled-1680-/ZRRimage.png)](https://docs.goodwindcorp.com/uploads/images/gallery/2026-04/ZRRimage.png)

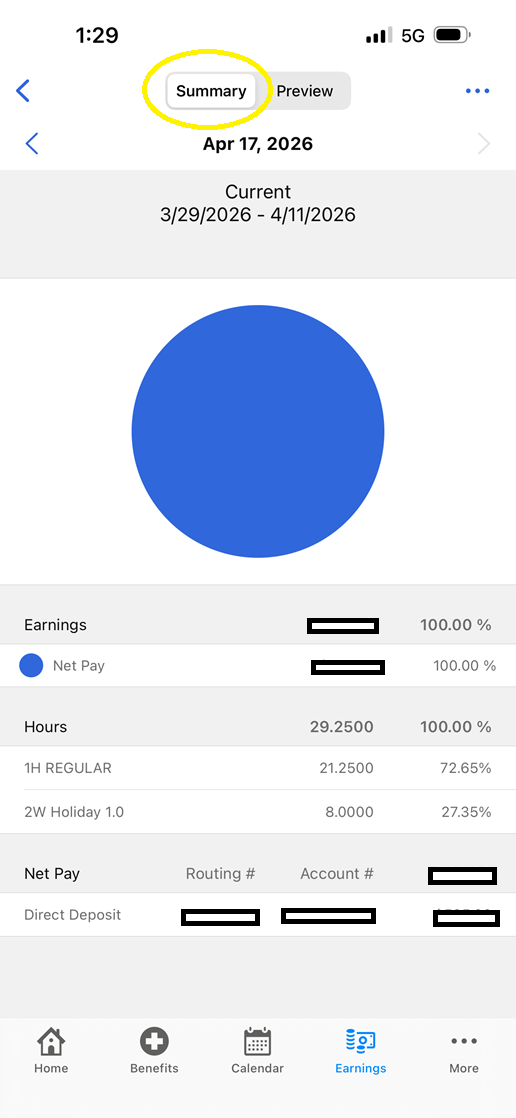
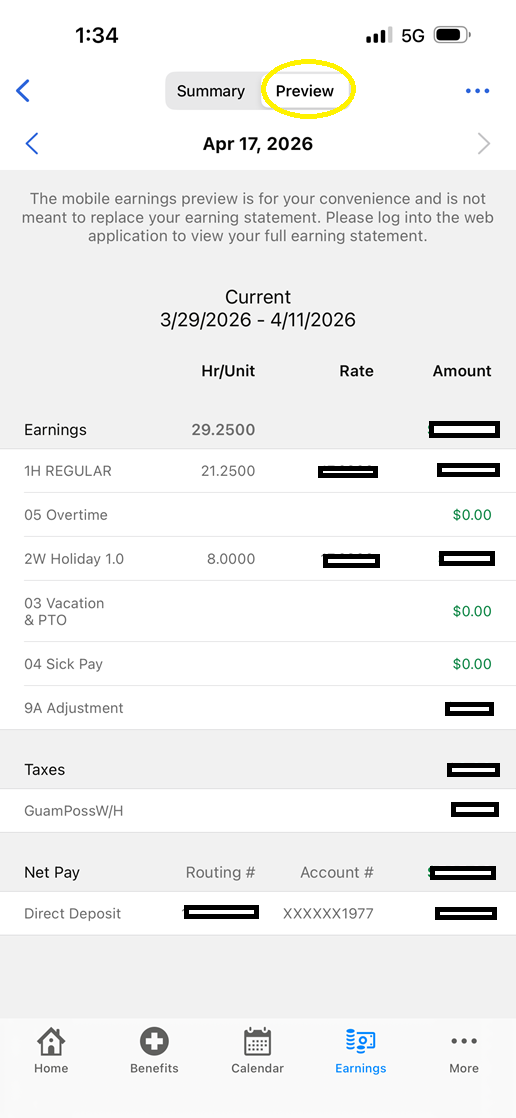
6\. Check stub can be viewed through the following:

<table border="1" class="align-center" id="bkmrk-click-%22summary%22-butt" style="border-collapse: collapse; width: 77.8571%; height: 772px;"><colgroup><col style="width: 49.9863%;"></col><col style="width: 49.9863%;"></col></colgroup><tbody><tr style="height: 797.8px;"><td style="height: 797.8px;">Click "Summary" button

[![image.png](https://docs.goodwindcorp.com/uploads/images/gallery/2026-04/scaled-1680-/51kimage.png)](https://docs.goodwindcorp.com/uploads/images/gallery/2026-04/51kimage.png)

</td><td style="height: 797.8px;">Click "Preview" button

[![image.png](https://docs.goodwindcorp.com/uploads/images/gallery/2026-04/scaled-1680-/lThimage.png)](https://docs.goodwindcorp.com/uploads/images/gallery/2026-04/lThimage.png)

</td></tr></tbody></table>

Note: The mobile earnings preview is for employee's convenience and is not meant to replace your earnings statement. Employees can log into the web application to view full earning statement.