Dayforce Training
- Dayforce Training - Supervisors / Managers
- Logging In as Manager
- Schedule Creation for the Staff
- Authorizing Timesheet Records
- Time Off Request Entry
- Leave Approvals
- Dayforce Training - End Users(Employees)
Dayforce Training - Supervisors / Managers
Supervisor/Manager Access Level
Logging In as Manager
- How to Access Dayforce on the Laptop / Desktop
- Go to the Dayforce Website at MyDayForce Login
- Sign in by putting the Company ID: GDCGroup and then click "continue to username."
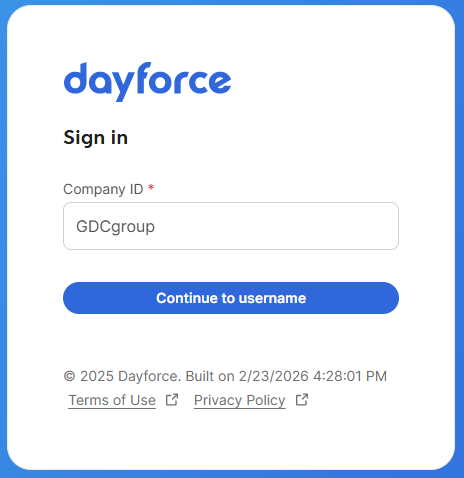
3. Type the username: username Format: firstname.lastname and then click "continue to password."
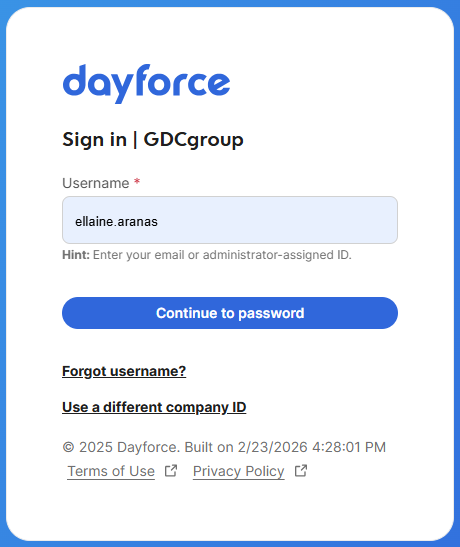
4. Type the password set to the account and then click "Log in."
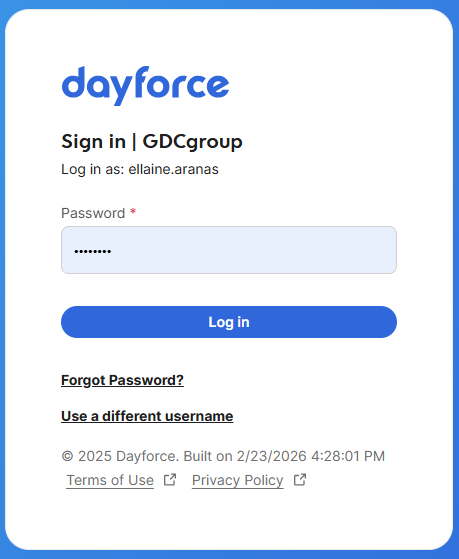
5. Select the Role " Manager with WFM" and then click "Next."
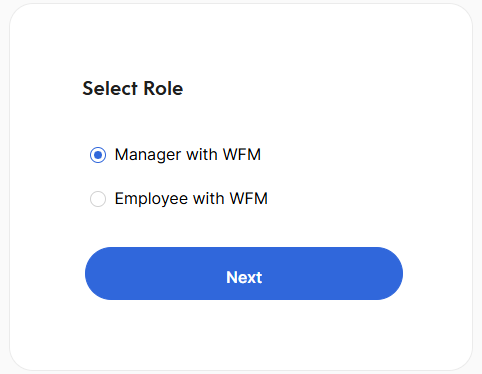
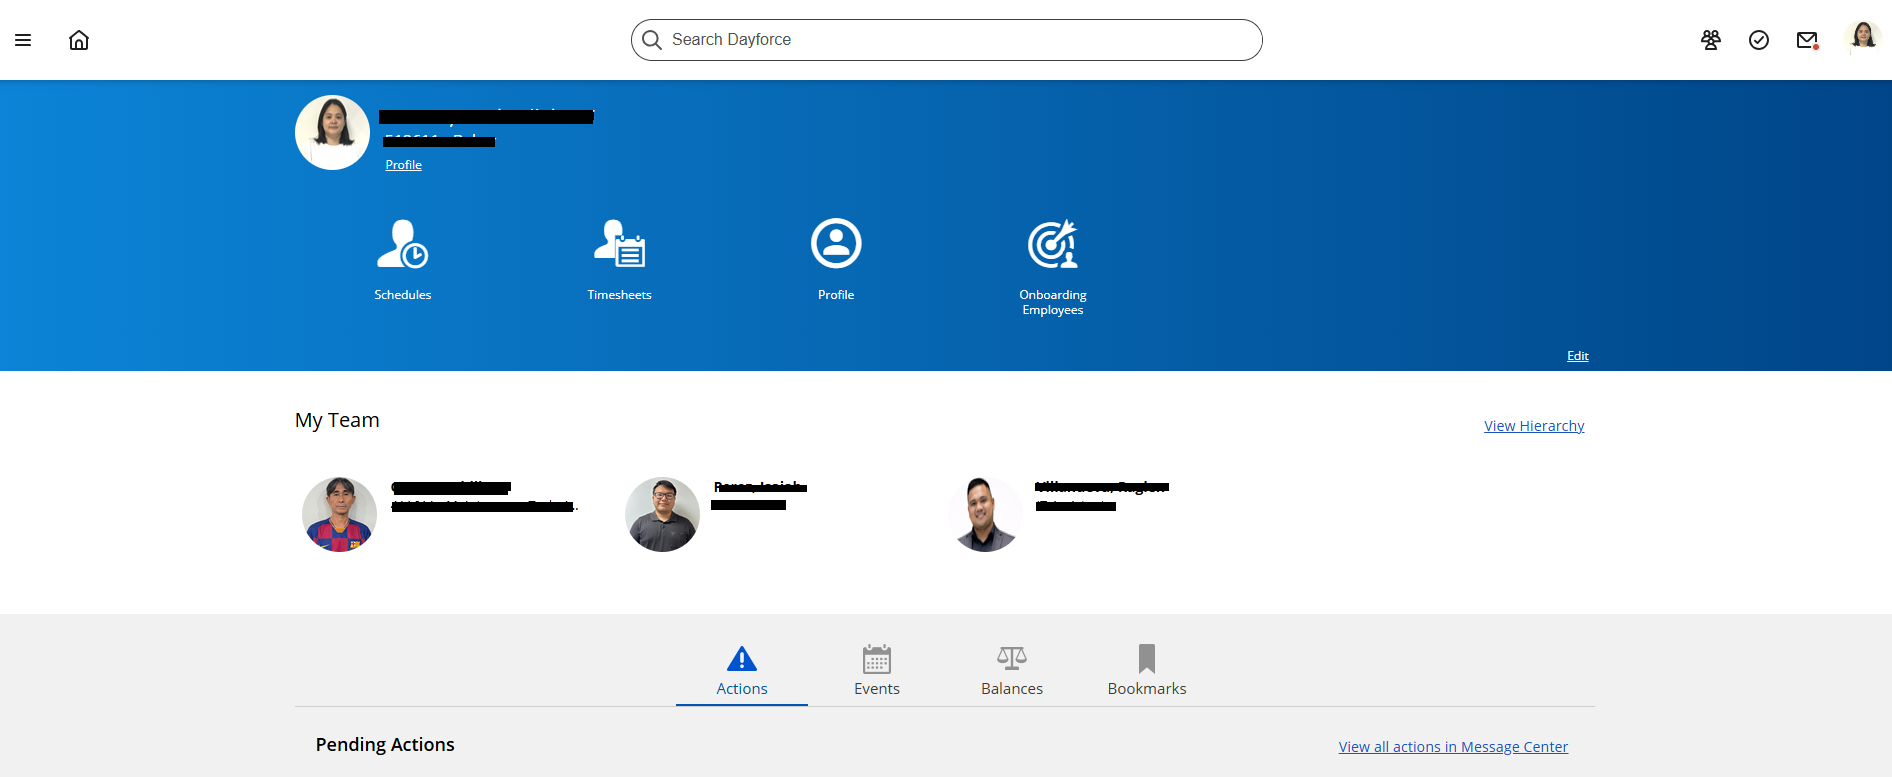
6. Home page will appear on the screen.
Schedule Creation for the Staff
Option 1: Specific Date
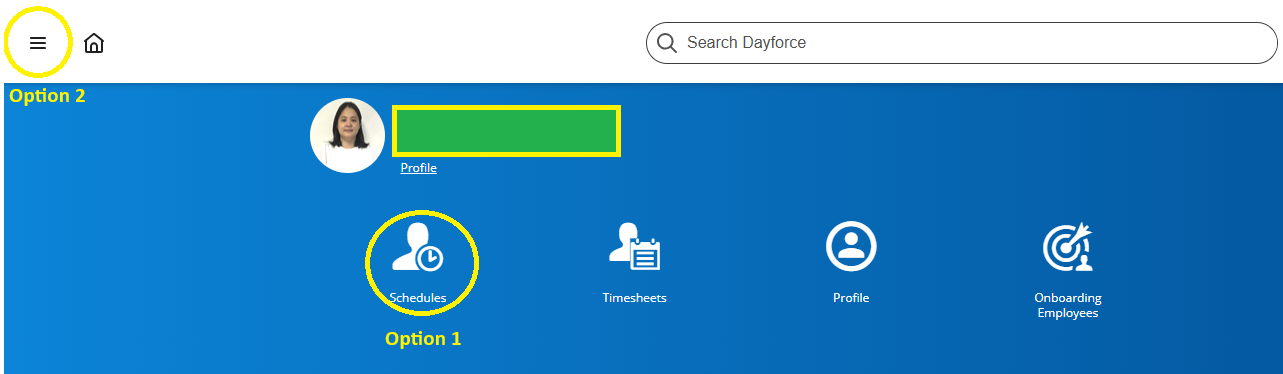
- Option 1: Click the icon "schedule."
- Option 2: Click the navigation or list icon.
-
-
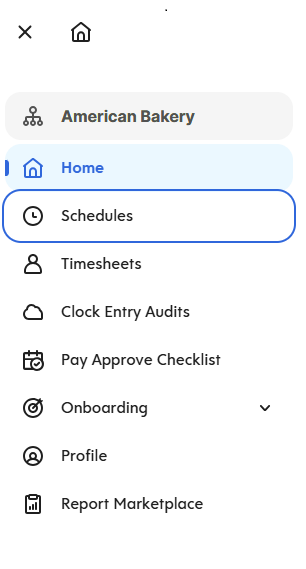
- For Option 2: after clicking the navigation icon, click "Schedules."
-
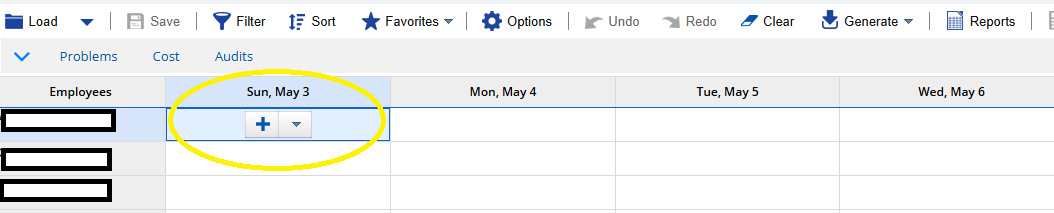
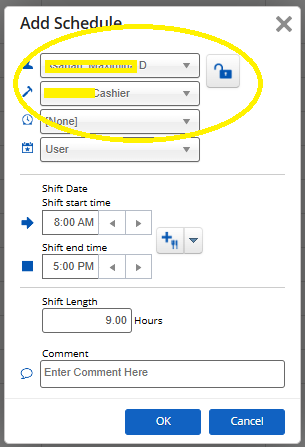
4. Employee Name, position, employee number will automatically appear on the screen.
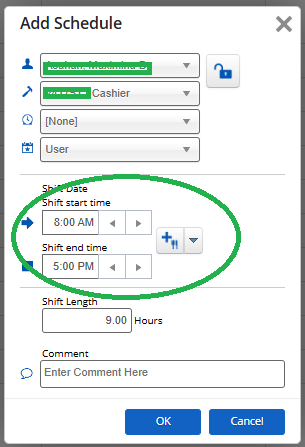
5. Input shift start time and end time.
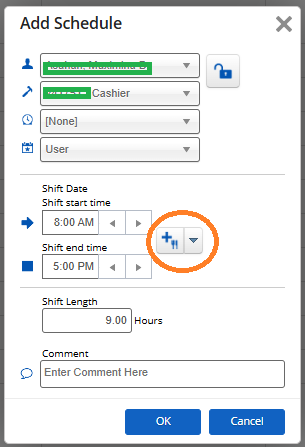
6. Click the "plus sign with the fork and knife" icon to add break time.
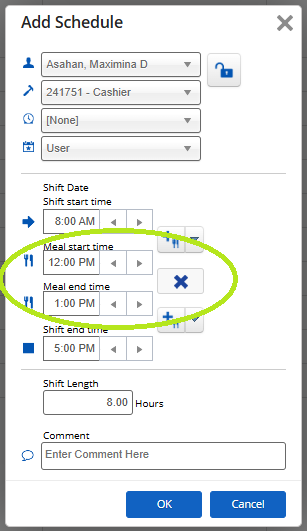
7. Input meal start time and meal end time and then click "ok." Shift length will automatically calculate once time has been inputted.
Option 2: Generate Weekly Schedule From Previous Week
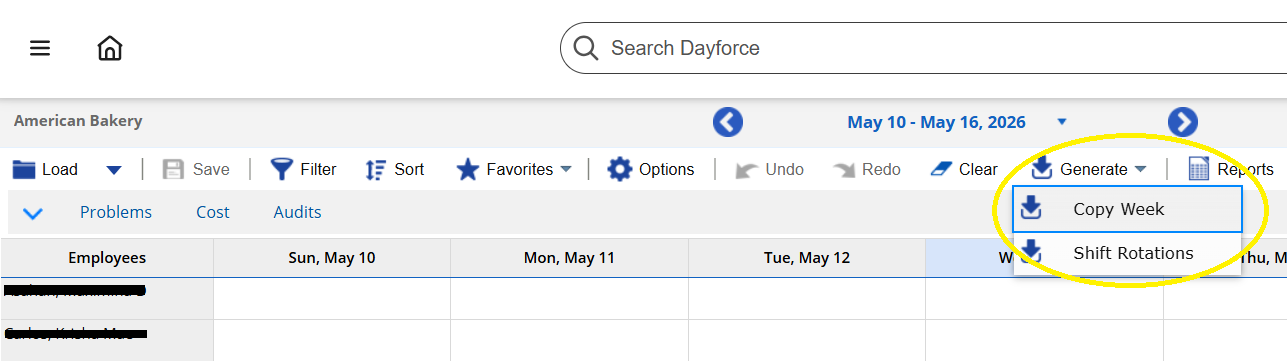
- Go to "Schedules."
- Click the "Generate" dropdown list and choose "Copy Week".

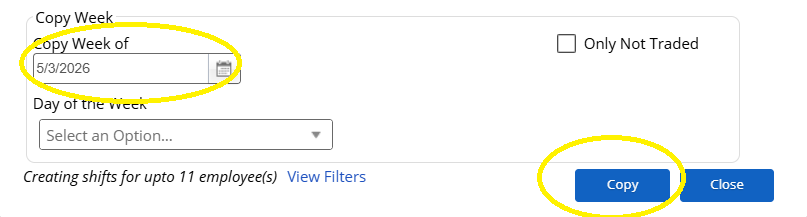
- Click the "calendar" button to choose the week that will be copied for the next schedule and then click "Copy."

- Schedule for the entire week will show on the screen.


Authorizing Timesheet Records
Auhtorizing of Late in / Late out
- Option 1: Click the timesheet icon.
Option 2: Click the navigation / list icon.
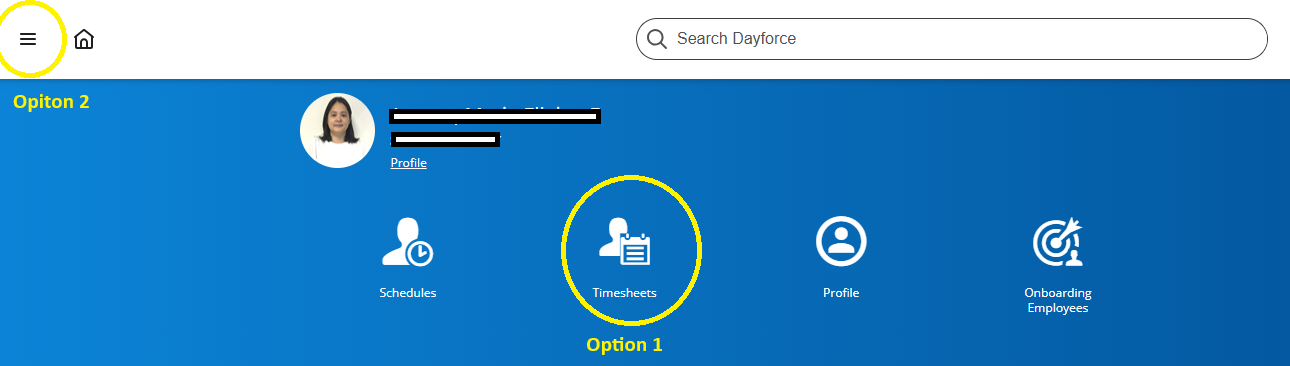
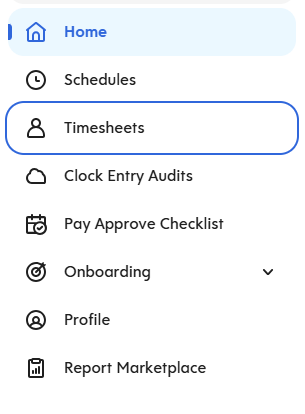
For option 2: after clicking the navigation / list icon, choose "timesheets" in the dropdown list.
2. Go to the specific date in the employee's name to approve late in / late out then click the "pencil" icon.
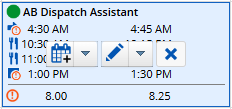
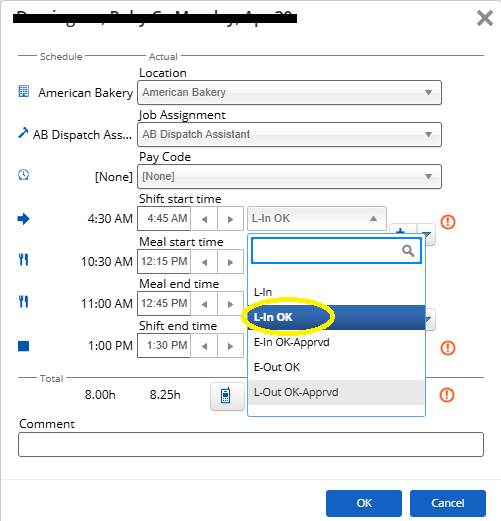
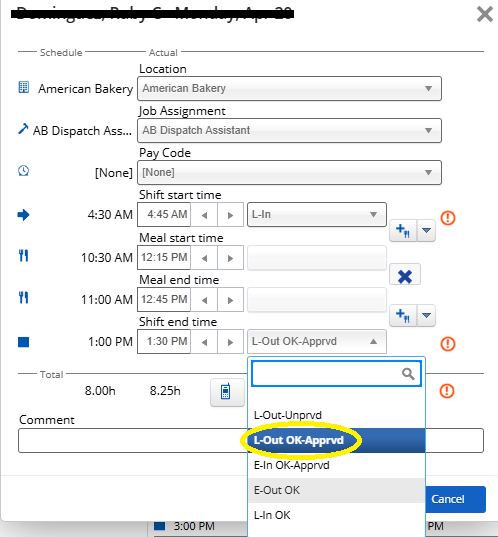
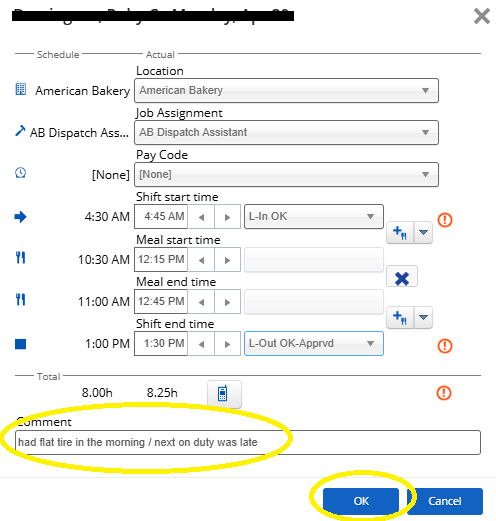
5. Input justification in approving late in / late out and then click "OK."
Authorizing Employee's shift
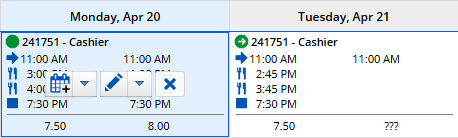
- For One Single Shift
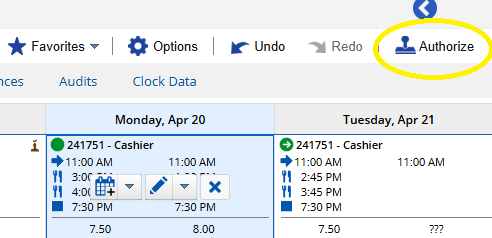
- Go to the specific employee and click date to authorize a shift. Specific box date will turn to blue.

- Click the icon "Authorize."

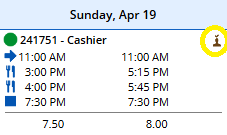
- A brown person with a check mark on top will appear once shift has been authorized.

- Go to the specific employee and click date to authorize a shift. Specific box date will turn to blue.
- For One Week Shift
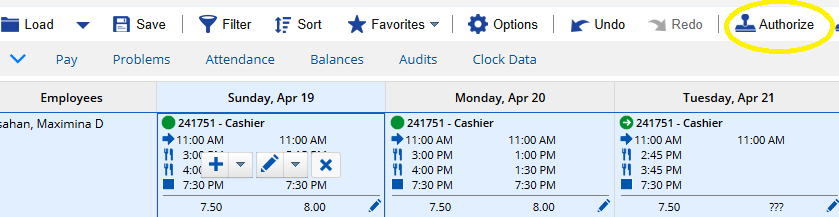
- Click the employee's name to highlight the entire week.

- Click the icon "Authorize."

- A brown person with a check mark on top will appear on each shifts once shift has been authorized.

- Click the employee's name to highlight the entire week.


Time Off Request Entry
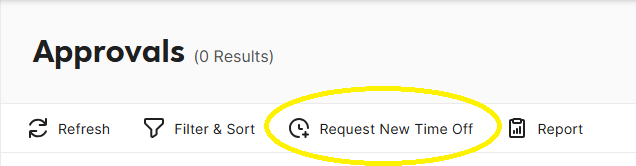
- Go to Approval.

- On the Approval toolstrip, Click "Request New Time Off."

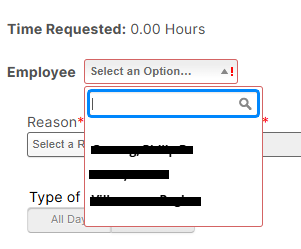
- On the employee dropdown list, click the employee's name.

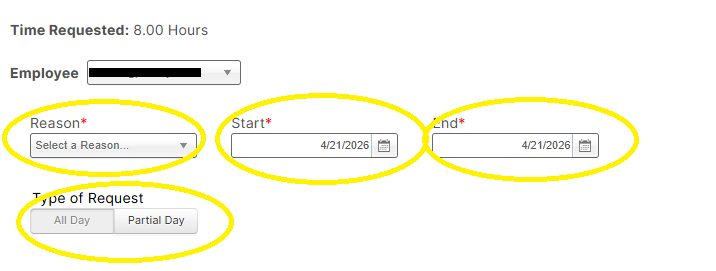
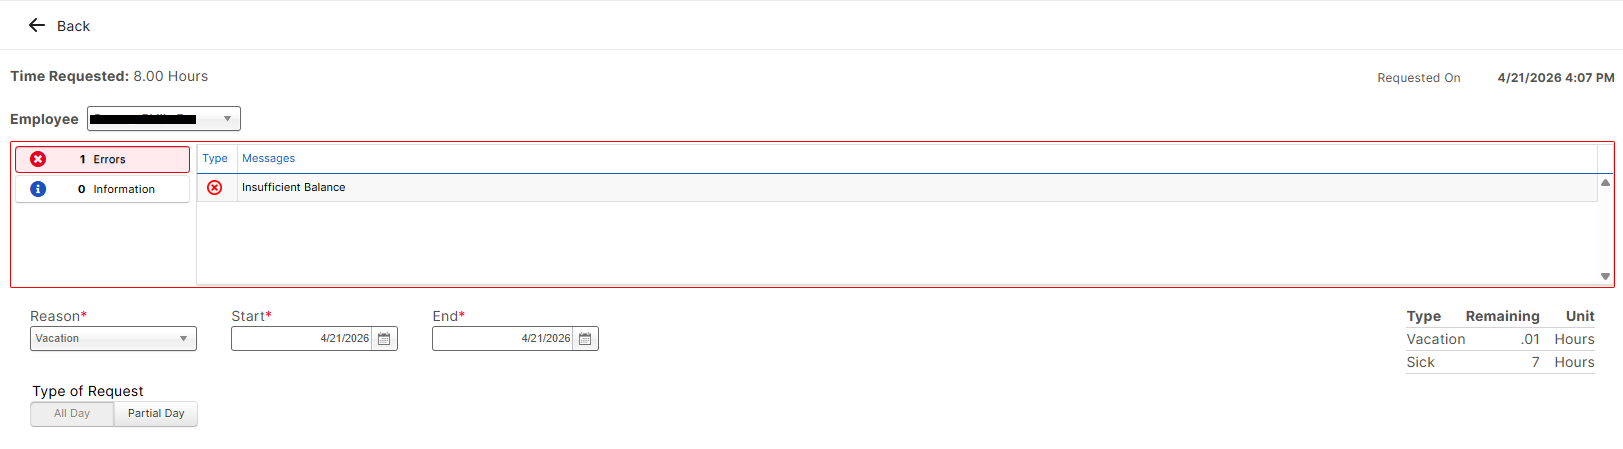
- Select Reason on the dropdonw list, input start and end date and click Type of request.

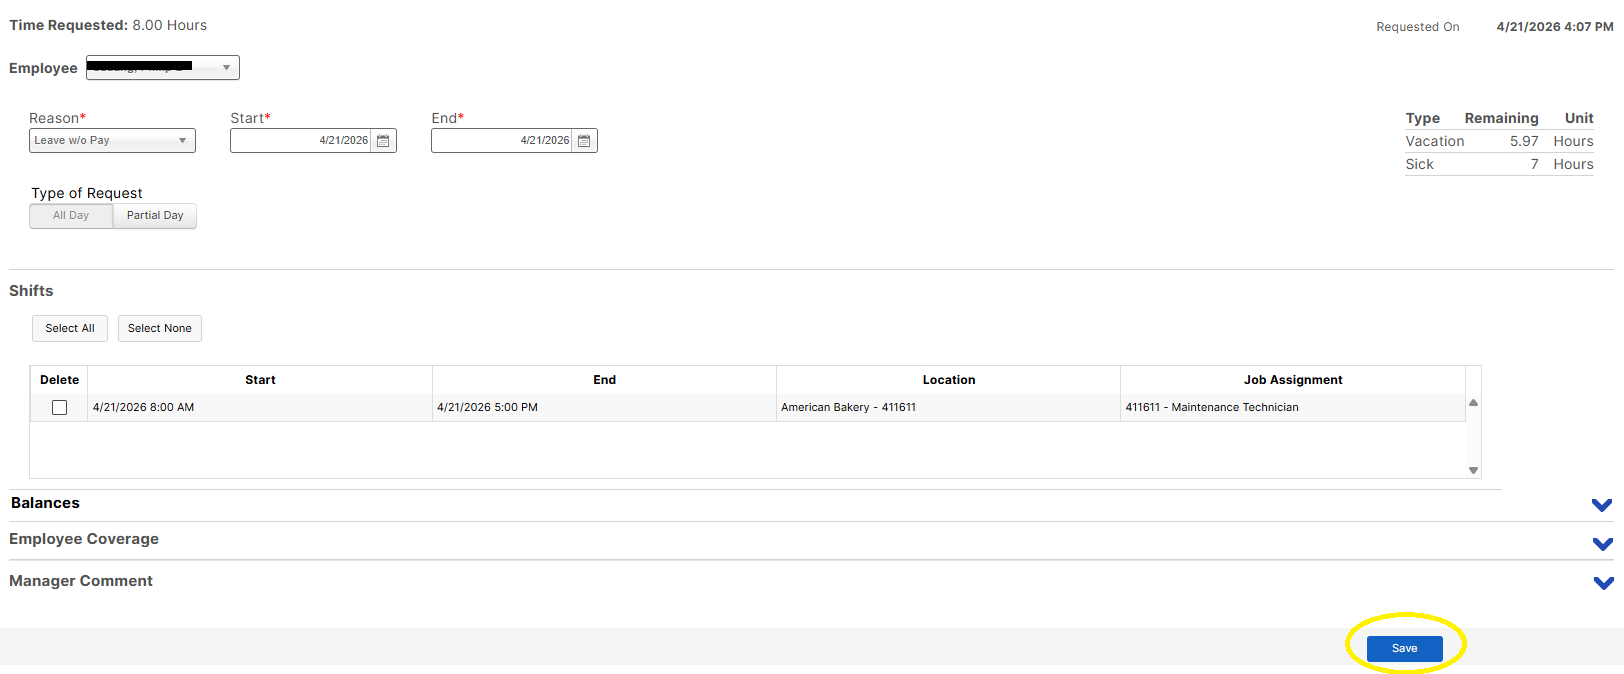
- Click "Save."

- If Leave balance is not enough, an error message will appear on the screen. Employee should have sufficient leave balance in order for the transaction to go through.


Leave Approvals
OPTION 1:
1. Click the "Approval" icon.

2. Click "Action" to view pending leave approvals.
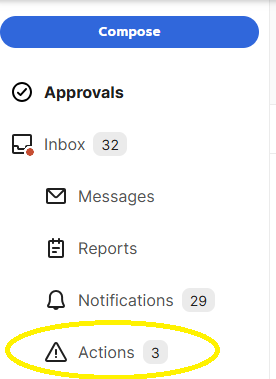
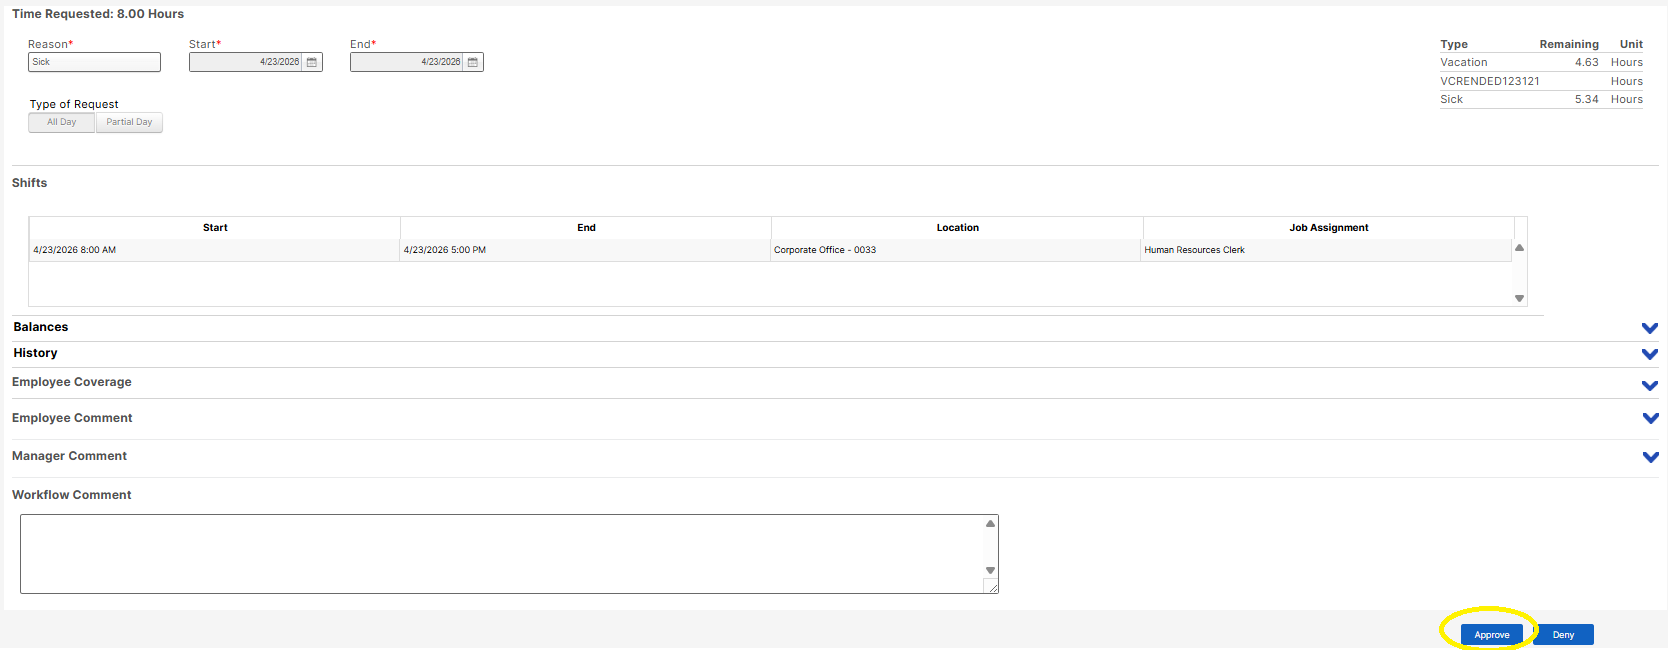
3. Click the leave request that you want to open.

4. Click the "Approve" icon to grant the leave request.
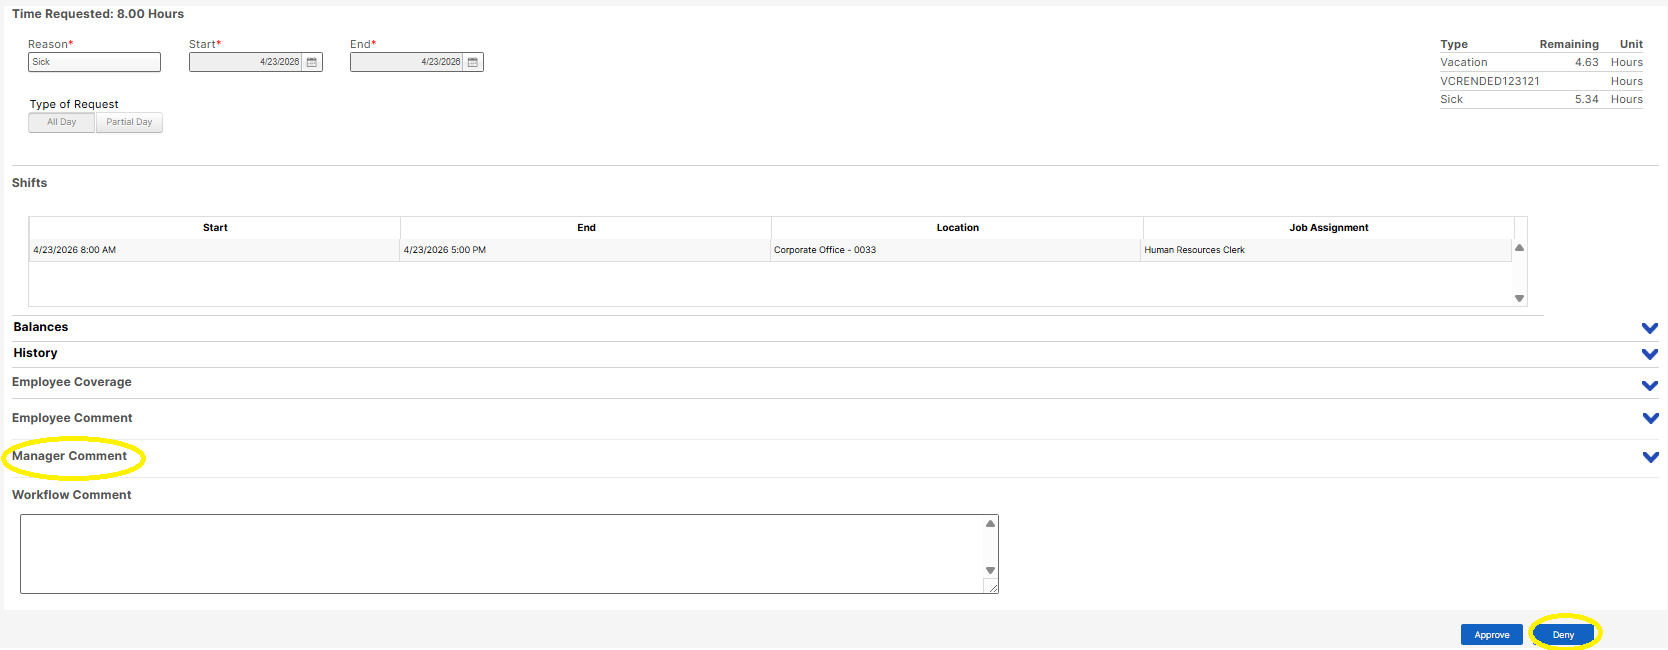
5. If Denied , click the " Manager comment" to input reason of denying the request and then click the" Deny" icon.
OPTION 2:
1. Click the "Approval" icon.
2. Click the "Approve" icon to grant the leave request.

5. If Denied , click the " Manager comment" to input reason of denying the request then click the" Deny" icon.
Dayforce Training - End Users(Employees)
Employee Access Levels
View Shifts / Schedule
Option 1: Using Laptop / Desktop
1. Log in to Dayforce at MyDayForce Login
|
Company ID: GDCgroup
|
Username: Firstname.Lastname
|
Password:
|
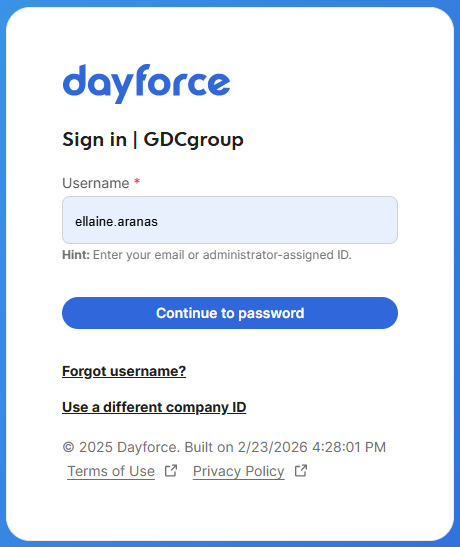
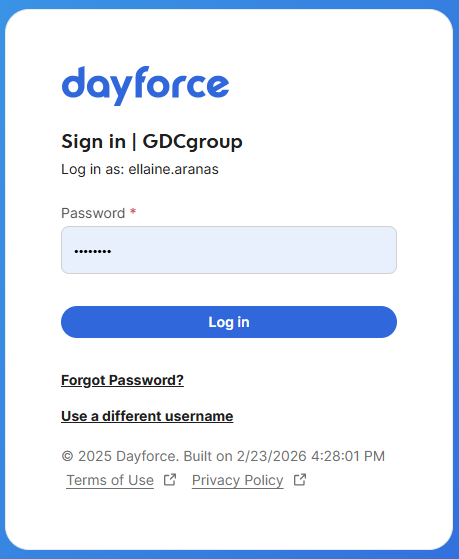
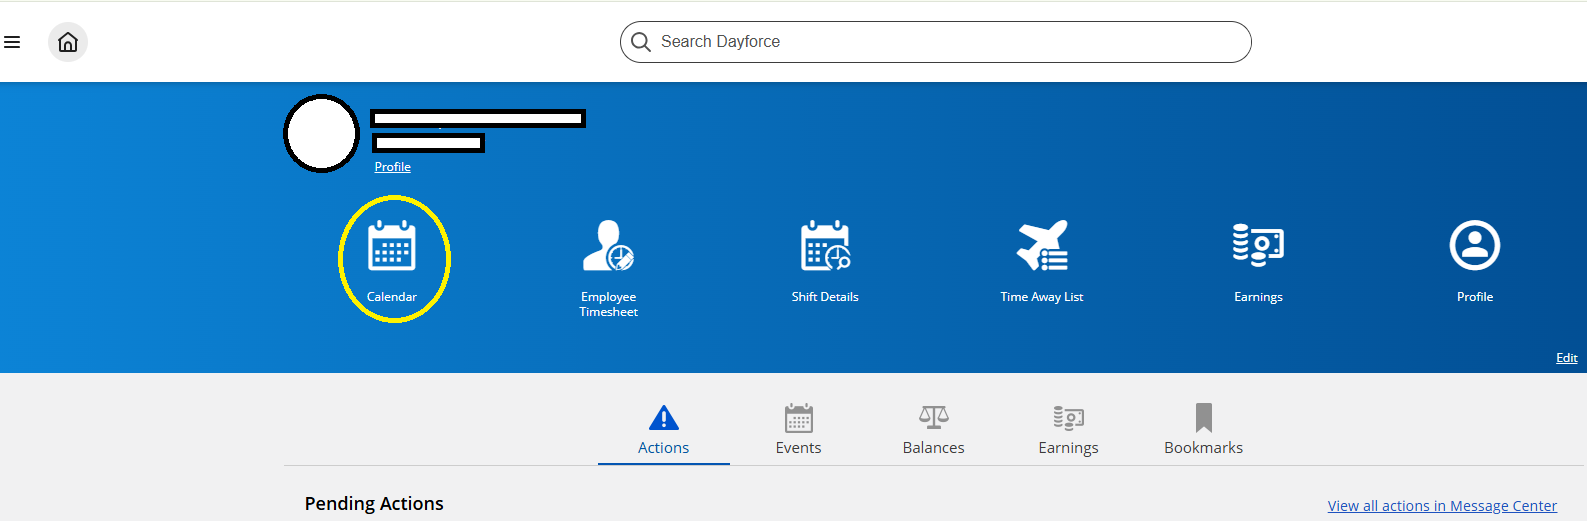
2. Click the "calendar" icon.
3. Calendar with the schedule will appear on the screen for the specified month.
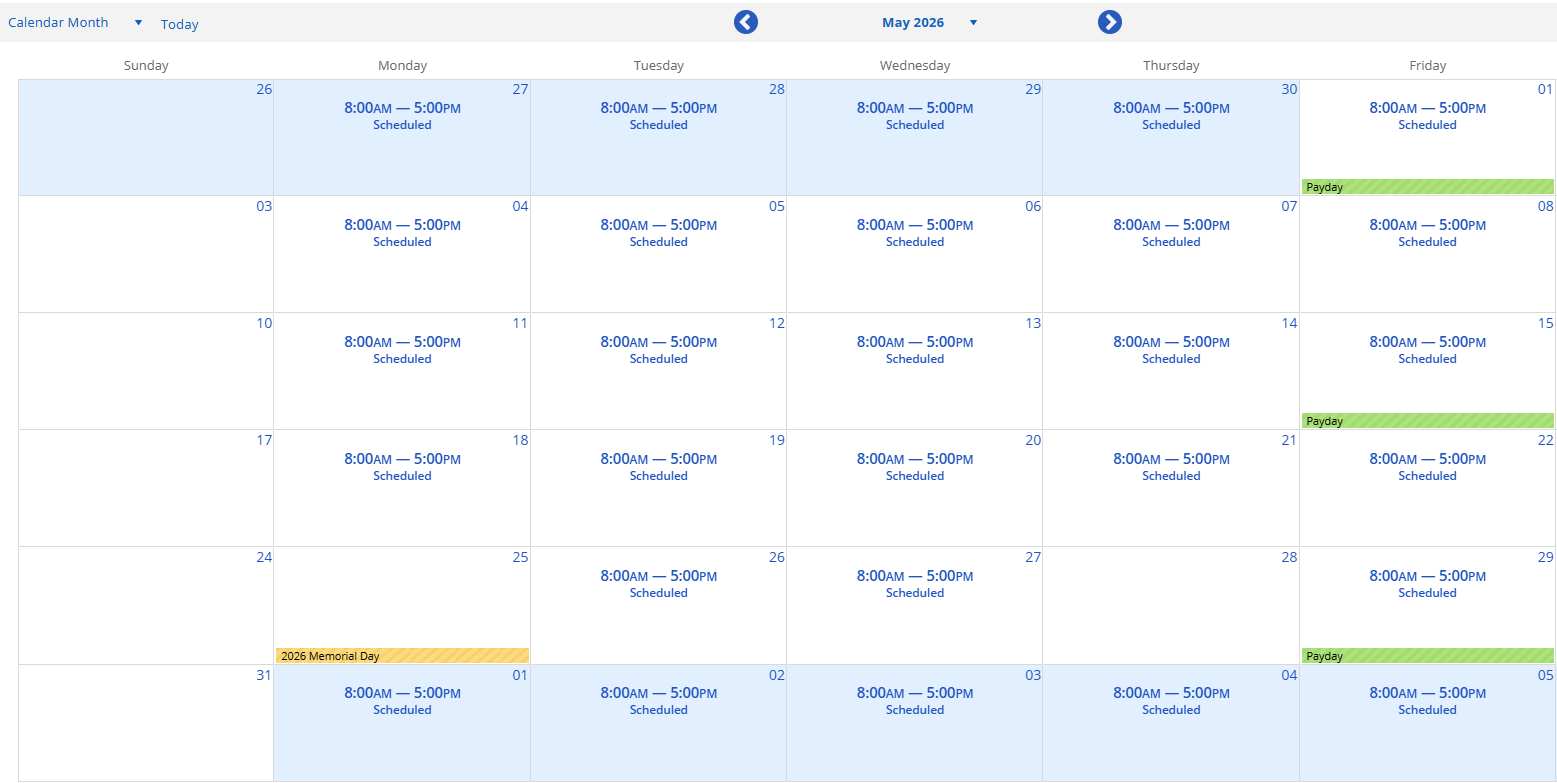
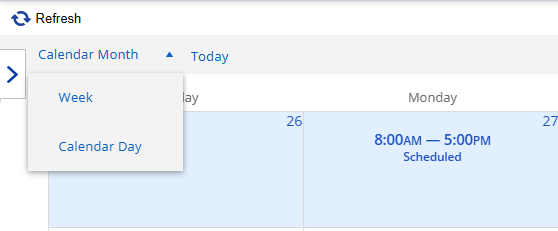
a. To view by week, click the Calendar dropdown list and choose "week."
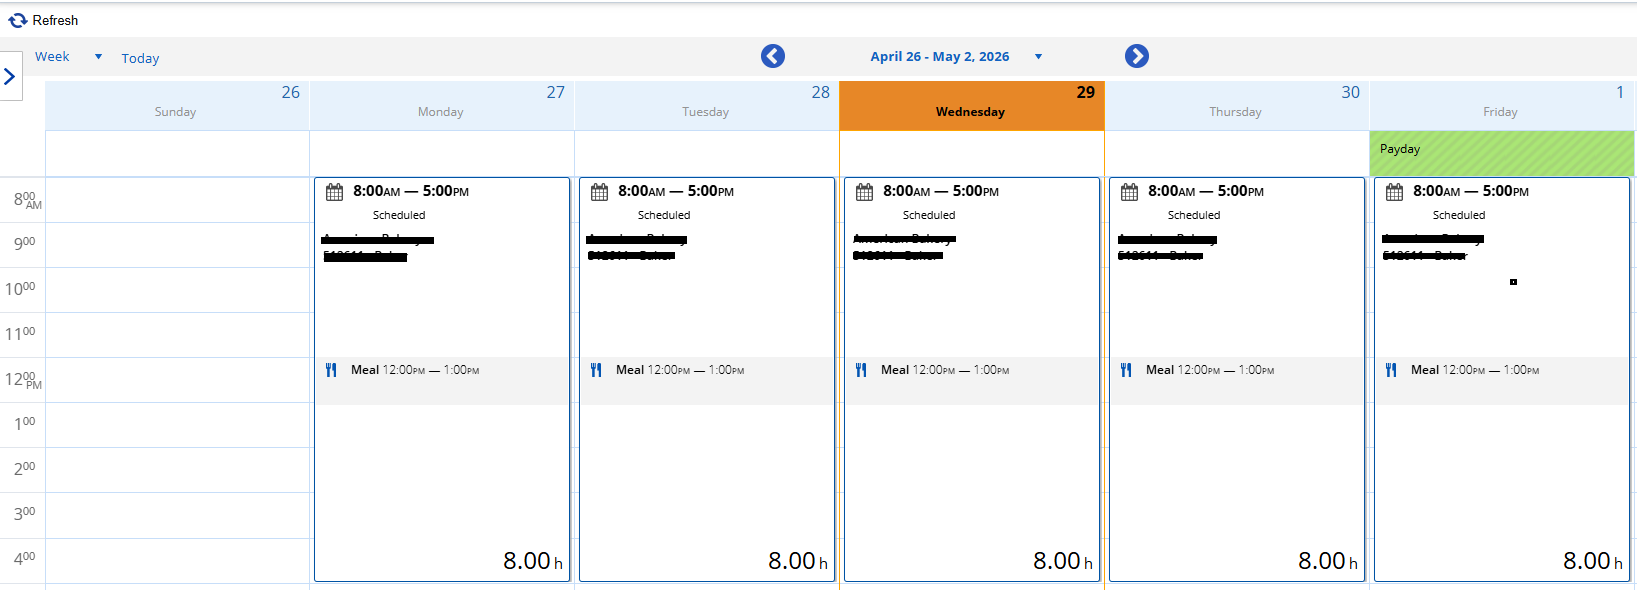
b. Schedule for the specified week will appear on the screen.
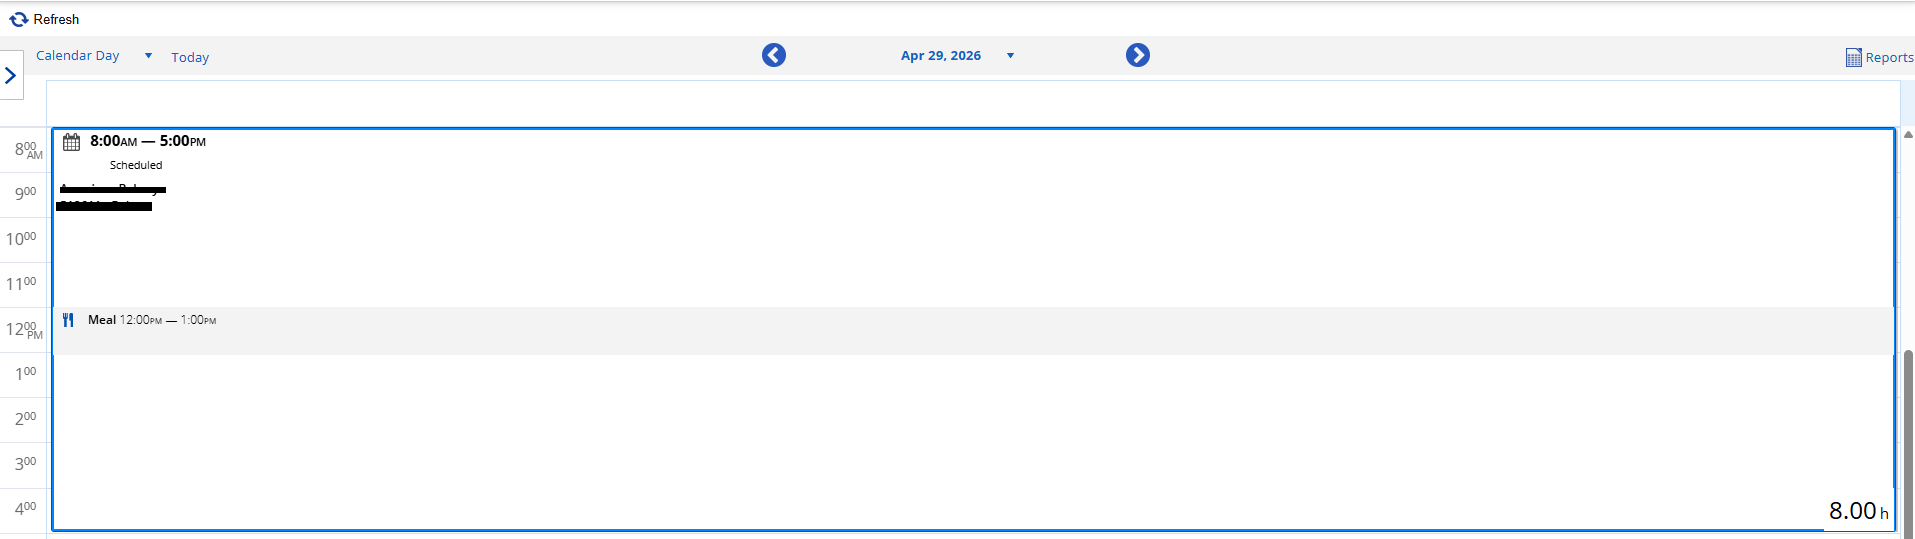
c. To view by day. click the calendar dropdown list and choose "calendar day."
d. Schedule for the specified day will appear on the screen.
Option 2: Phone Device
1. Download the Dayforce mobile application.
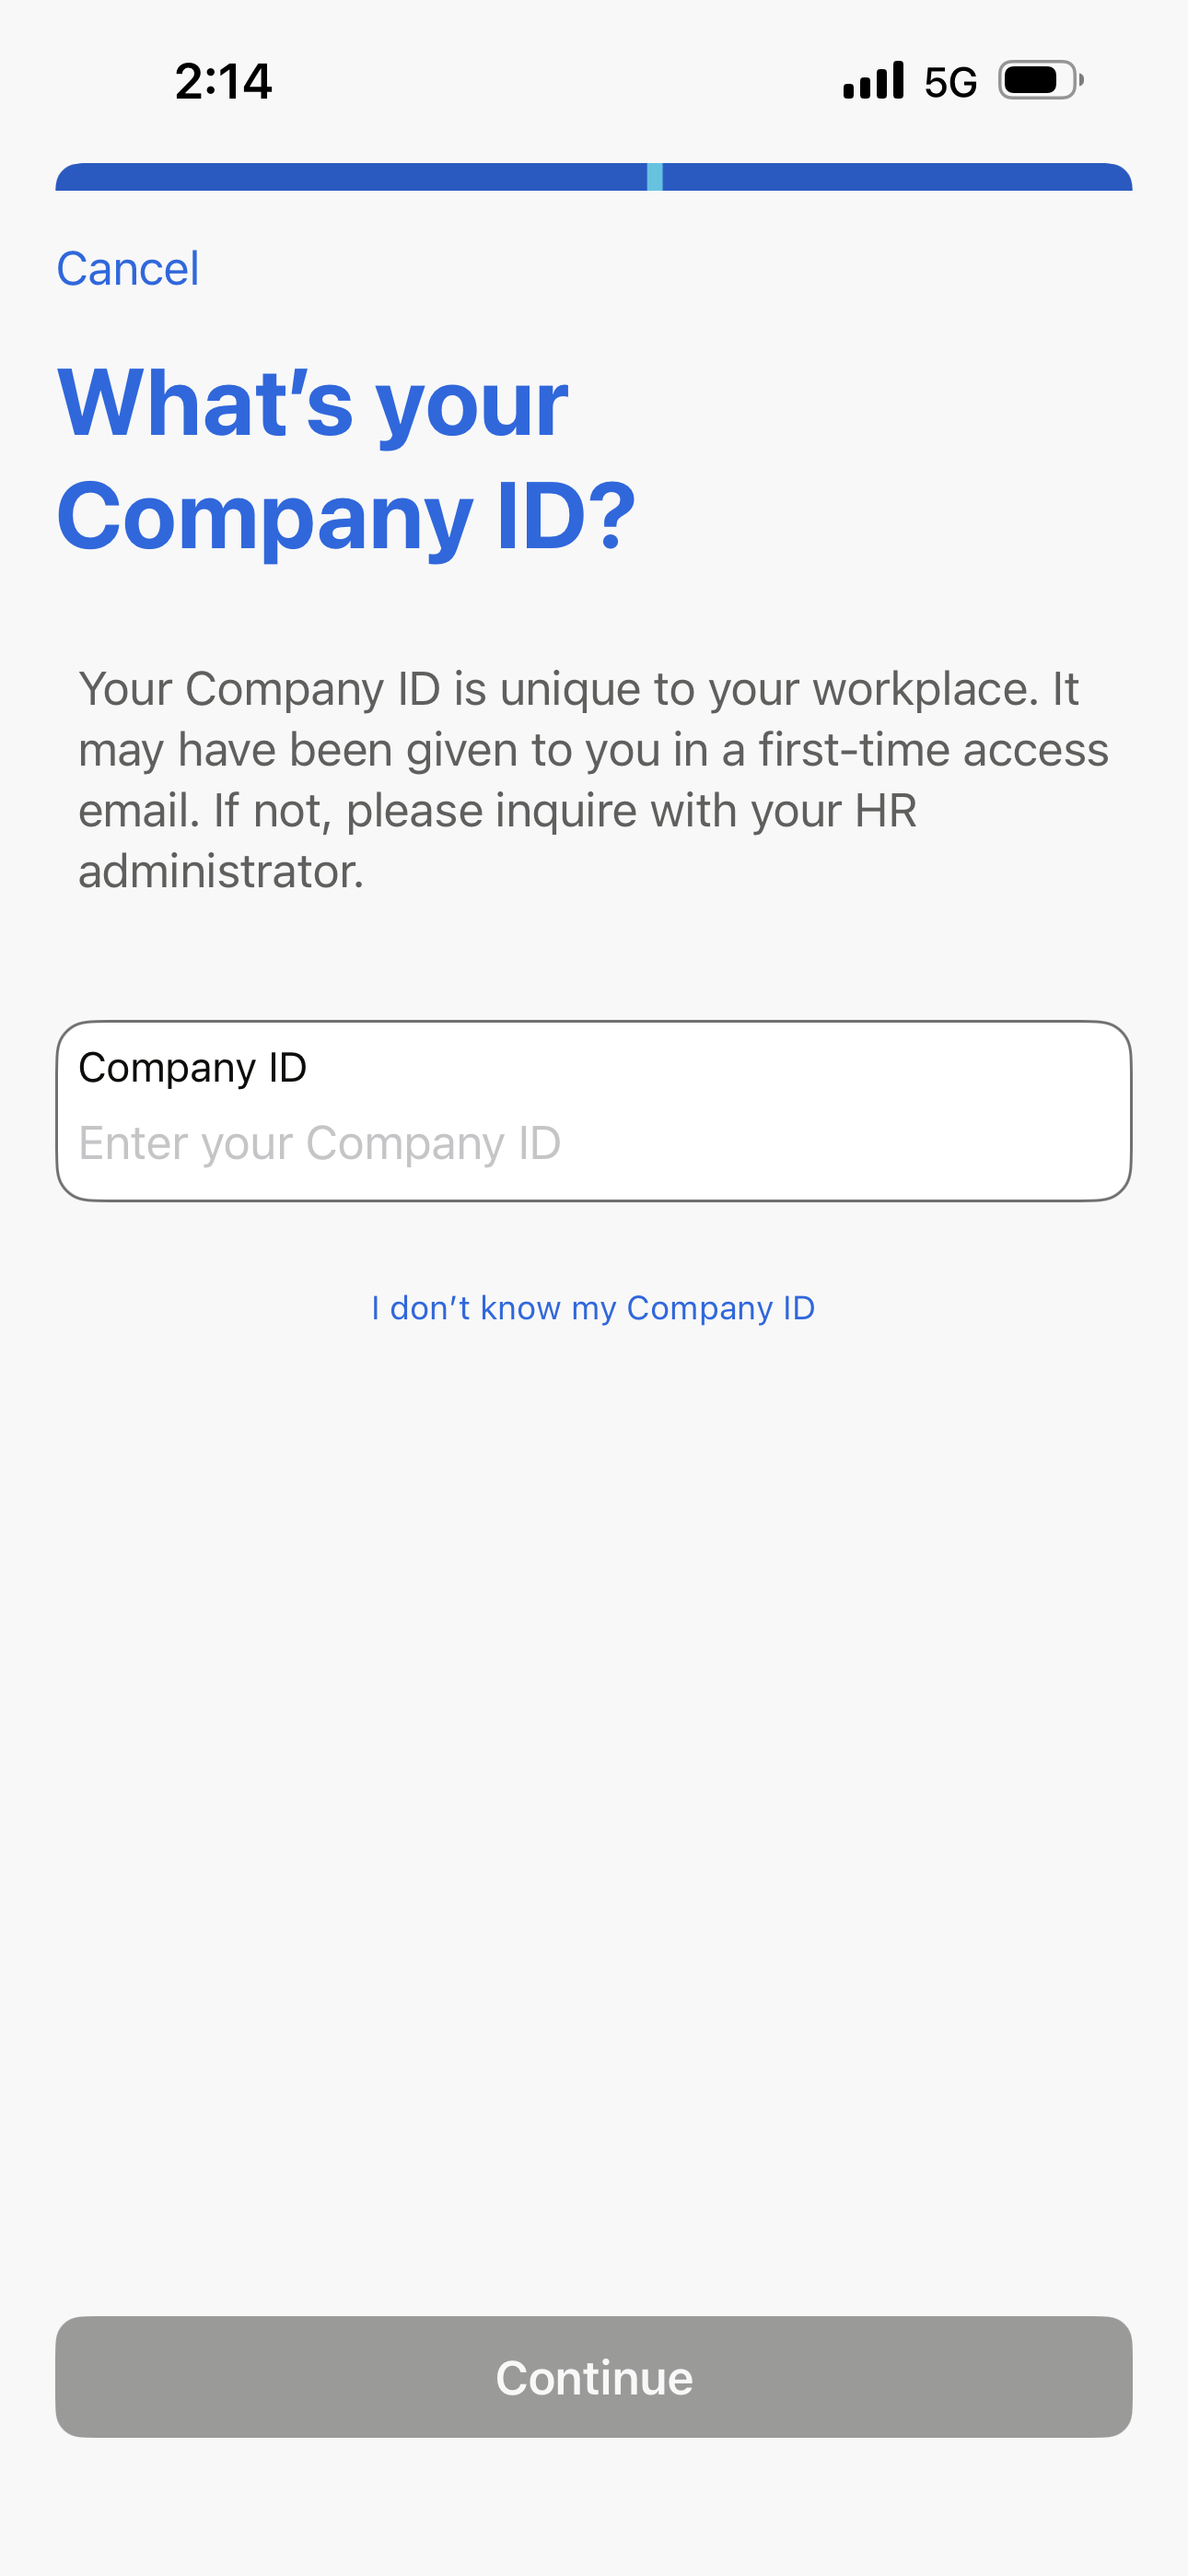
2. Click the Dayforce mobile application and input the following:
|
Company ID: GDCgroup
|
Username: firstname.lastname Password: **********
|
3. Home page will appear on the screen.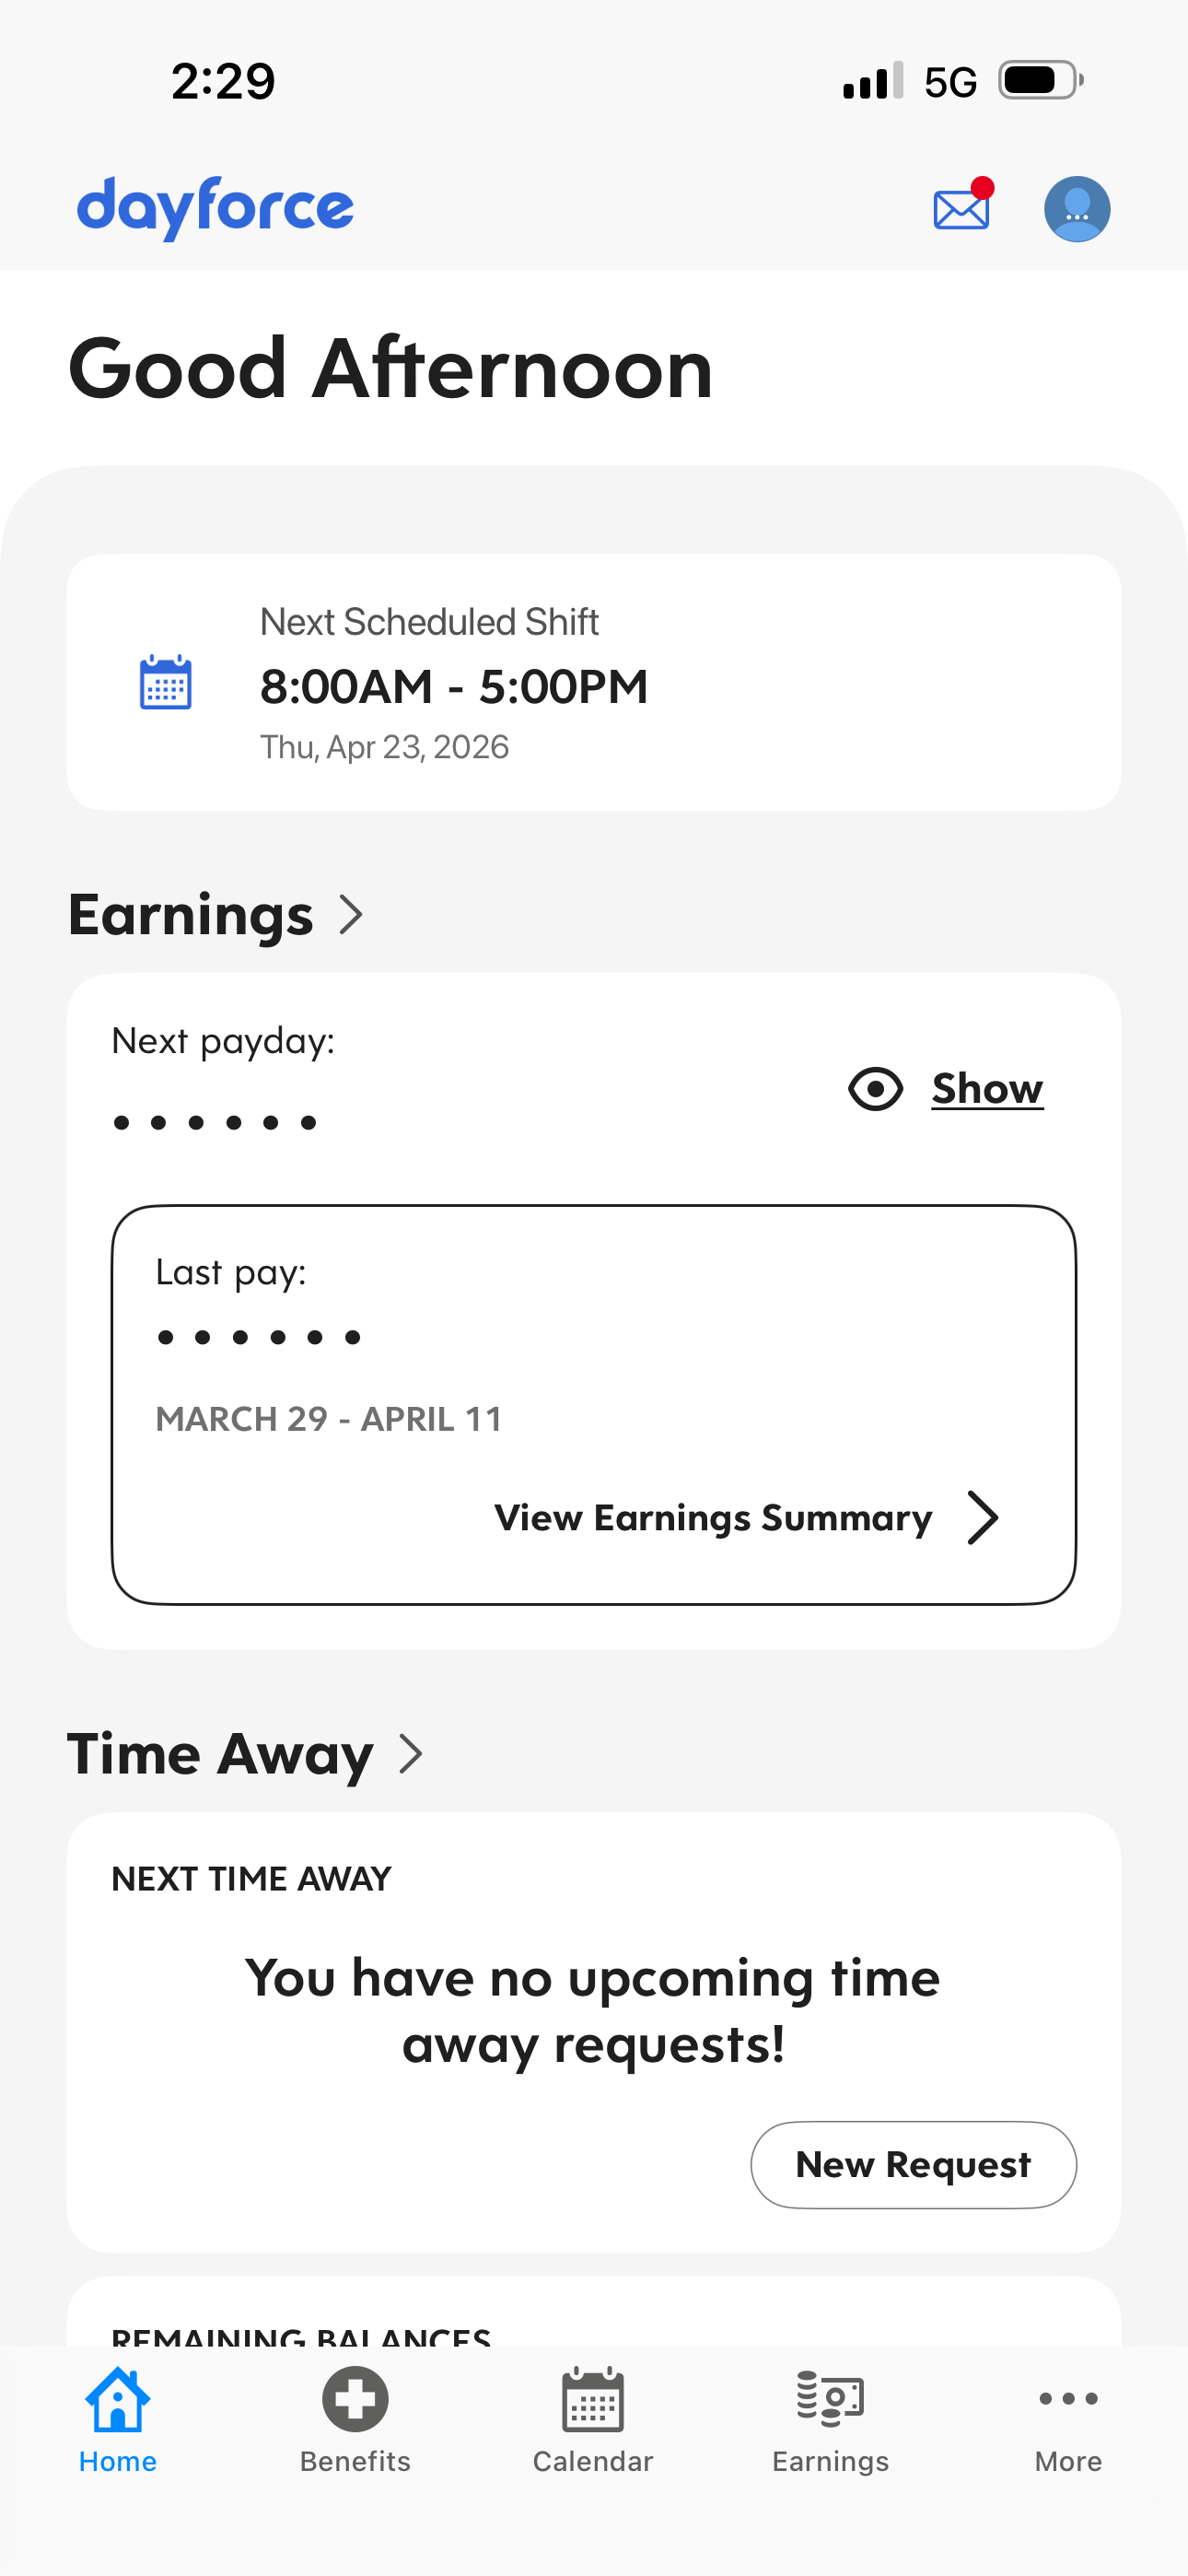
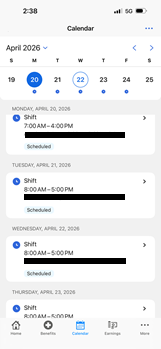
4. Click the "calendar" icon.

5. Shift/Schedule per day will appear on the screen.
Submitting Leave Requests
Option 1: Using Laptop/Desktop
1. Log in to Dayforce at MyDayForce Login
|
Company ID: GDCgroup
|
Username: Firstname.Lastname
|
Password:
|
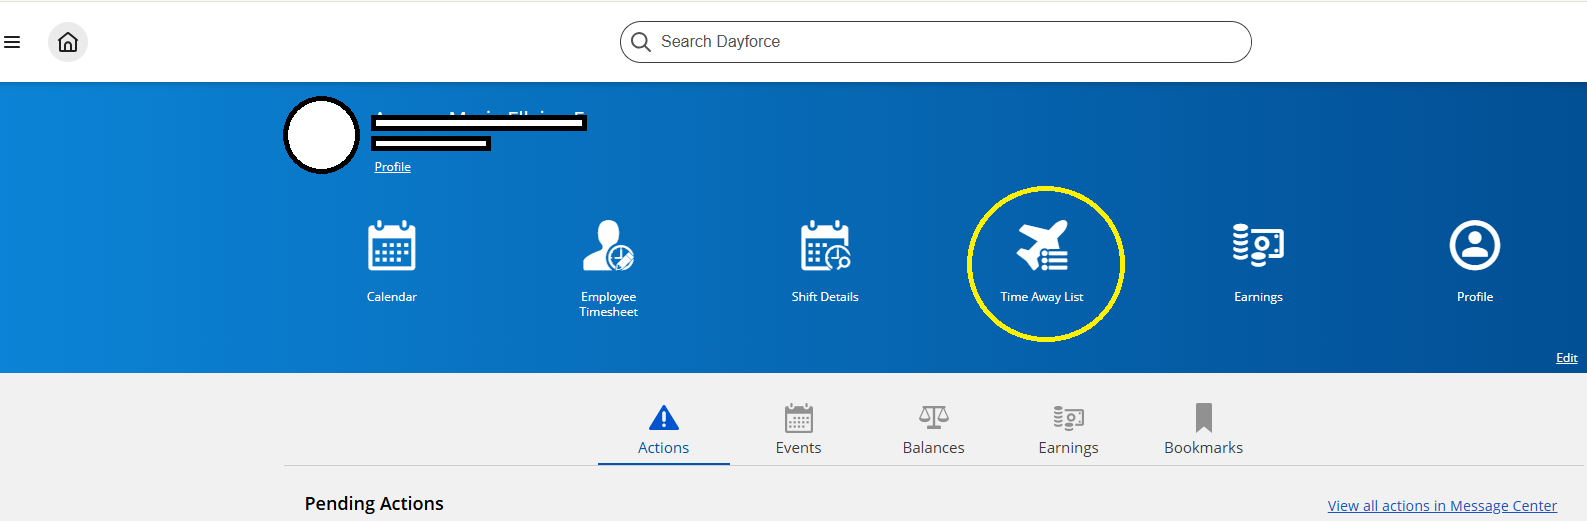
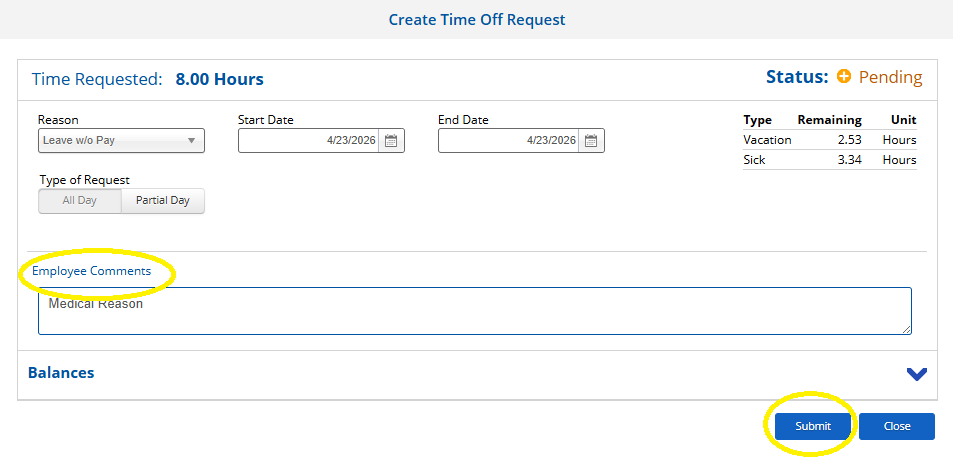
- Click the "Time Away List" icon.

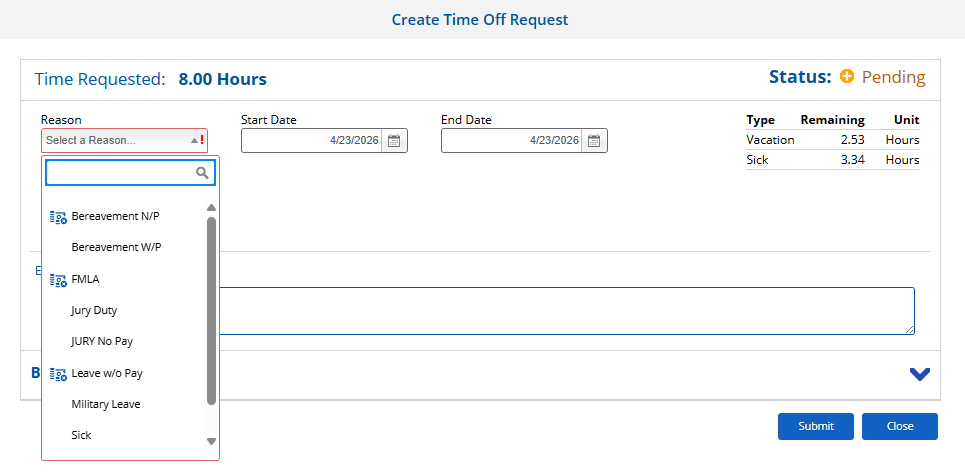
- Click the "Request Time Off" icon.

- Select Reason, start Date, End date and Type of Request.

- Employee can input in the employee comment section the reason or purpose of the leave request and then click "Submit."

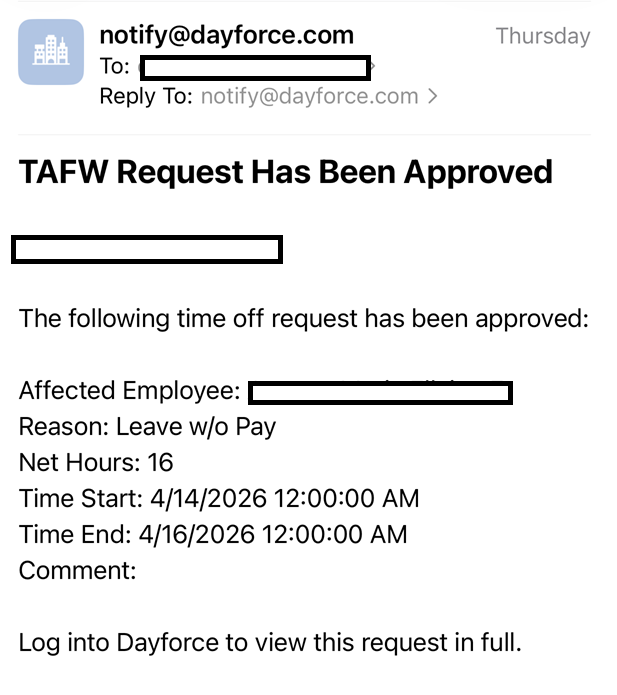
- Employee will receive an email once leave request has been approved.


Option 2: Using Phone Device
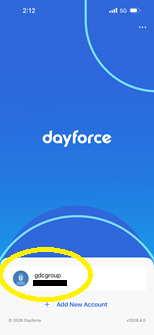
- Click the Dayforce application in the phone.
- Click the "GDCgroup" icon.
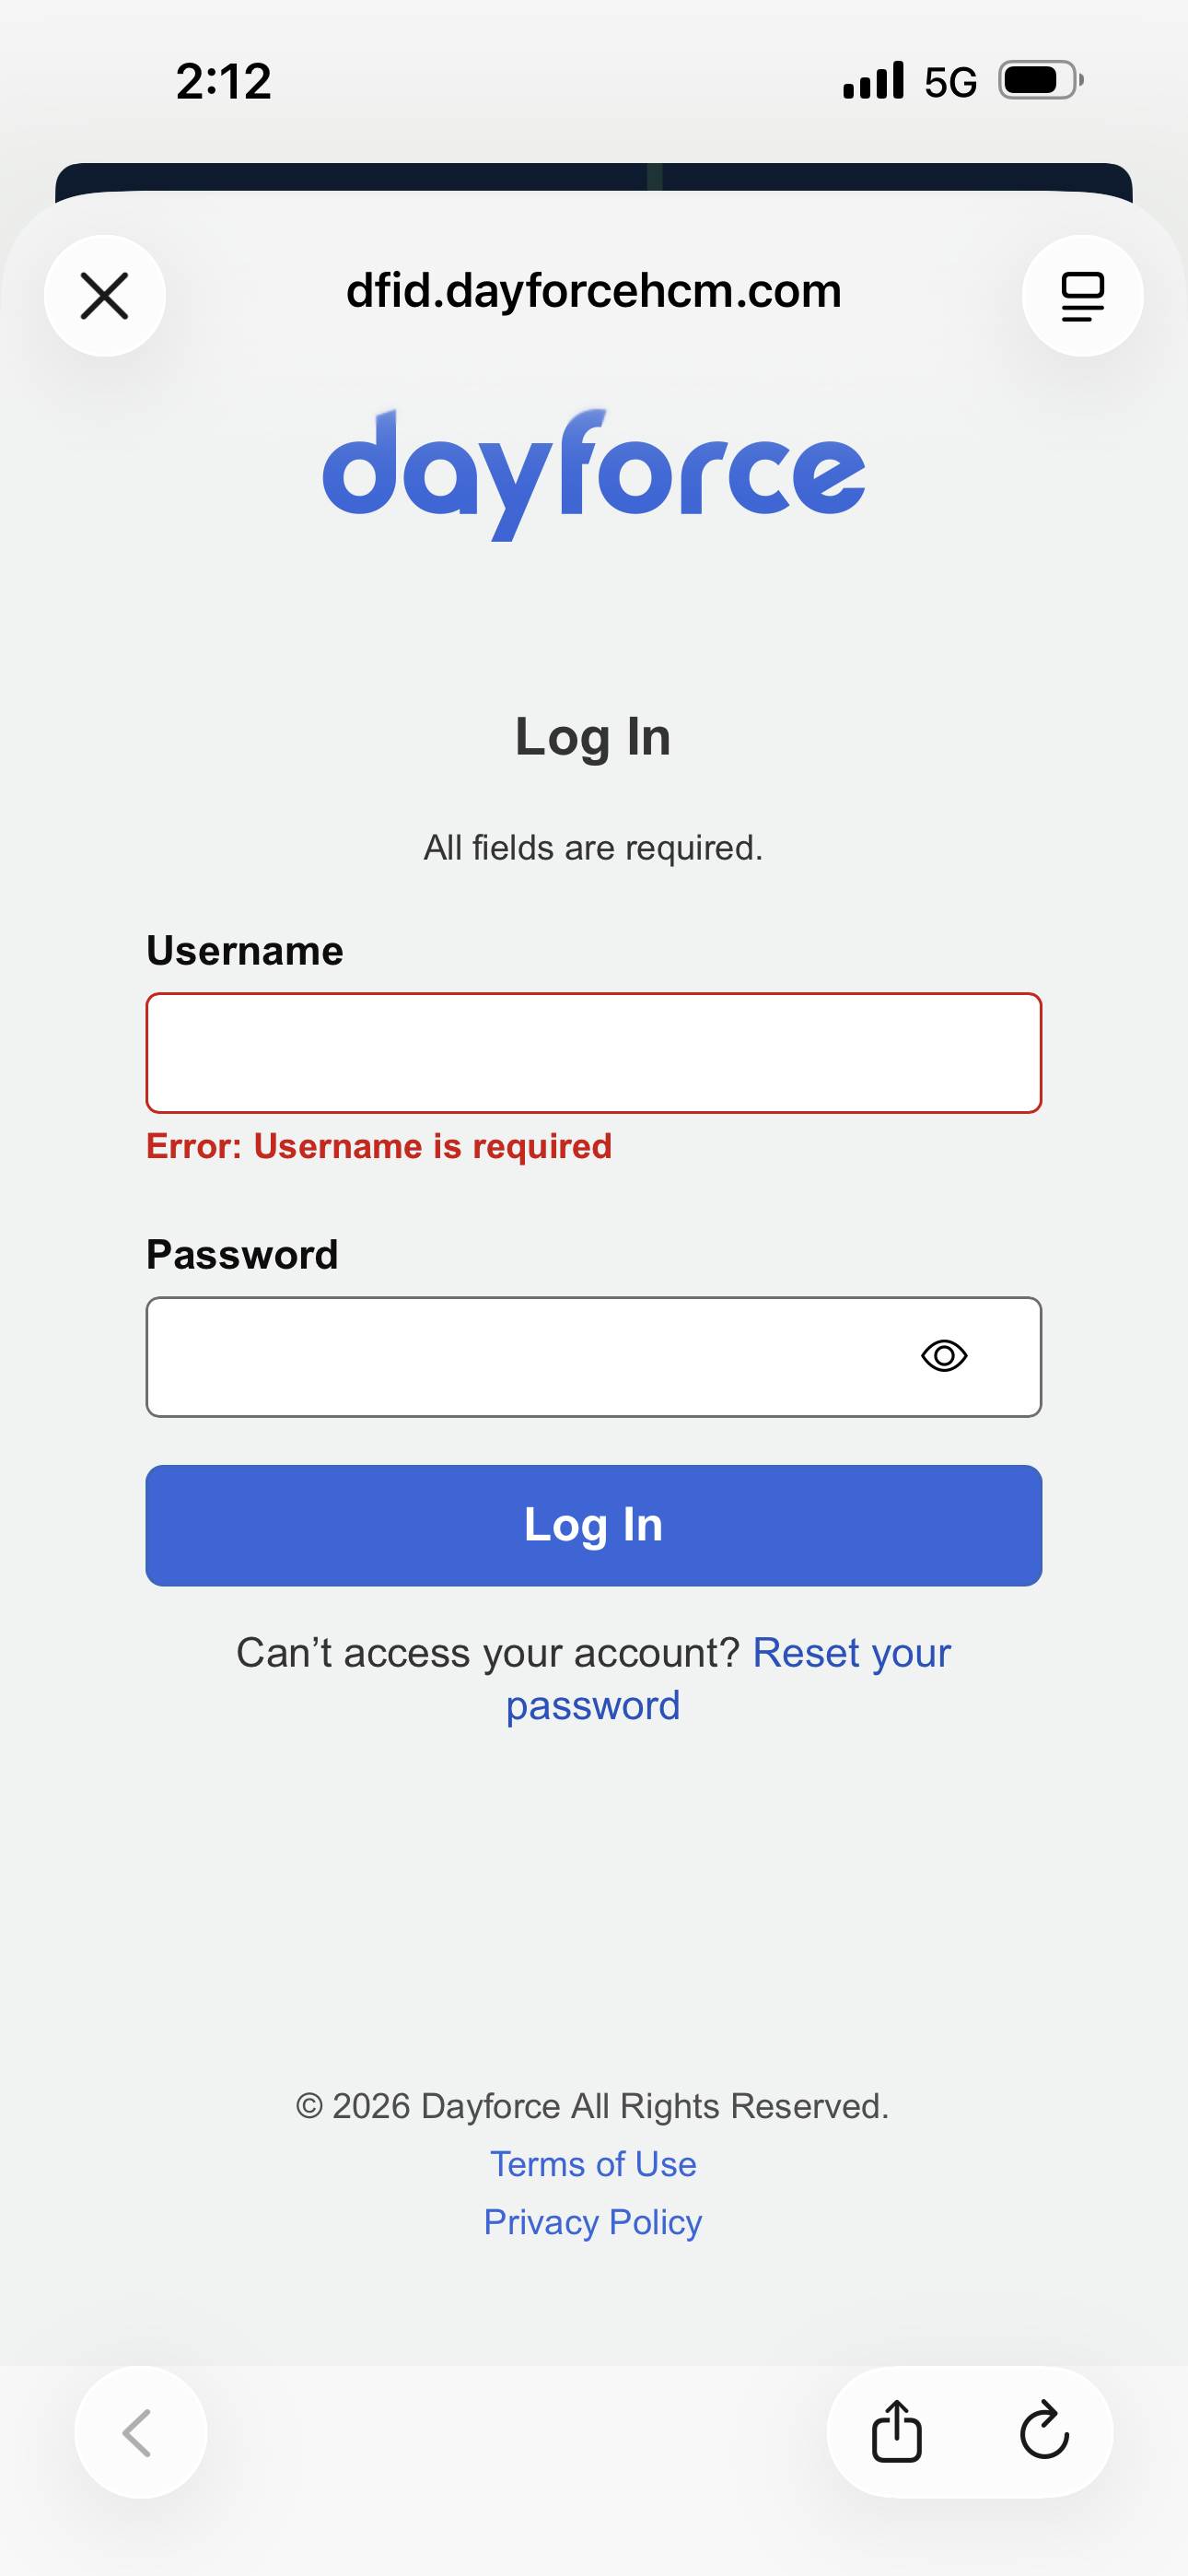
3. Log in to the account by typing the username and password and then click "Log In."
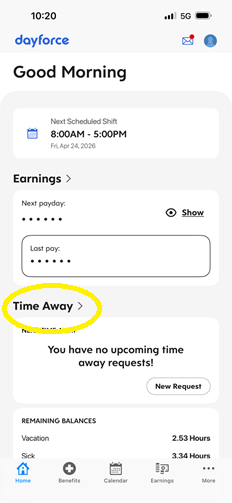
4. Click " Time Away."
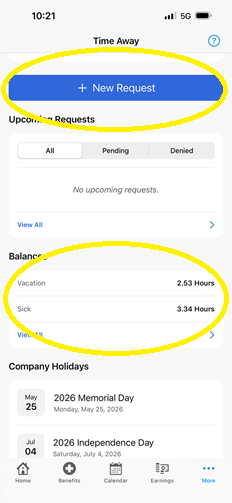
5. Check Leave balances, If with sufficient balance, click "New Request."
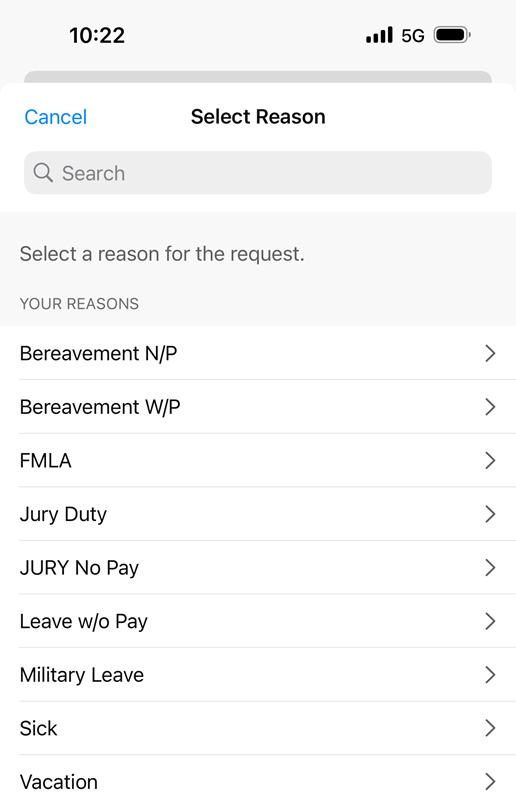
6. Select a reason for the request.
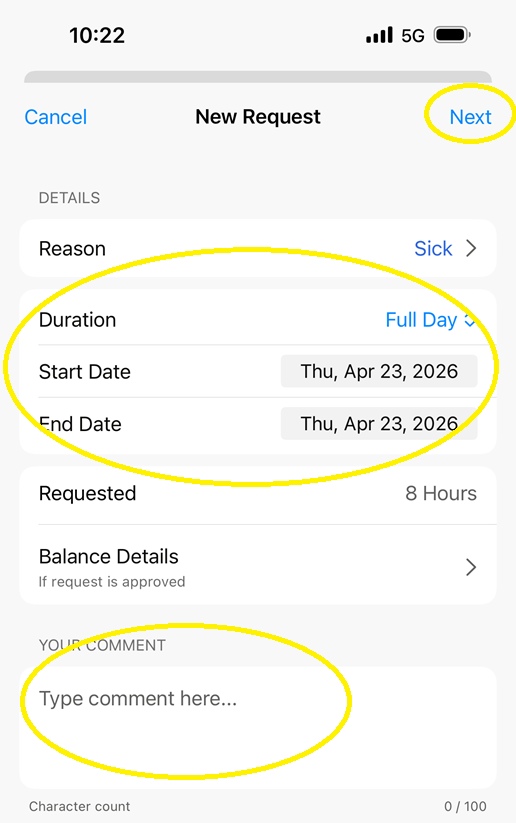
7. Input Duration (Full or Partial), Start Date, End Date and purpose of the request in the comment section then click "Next."
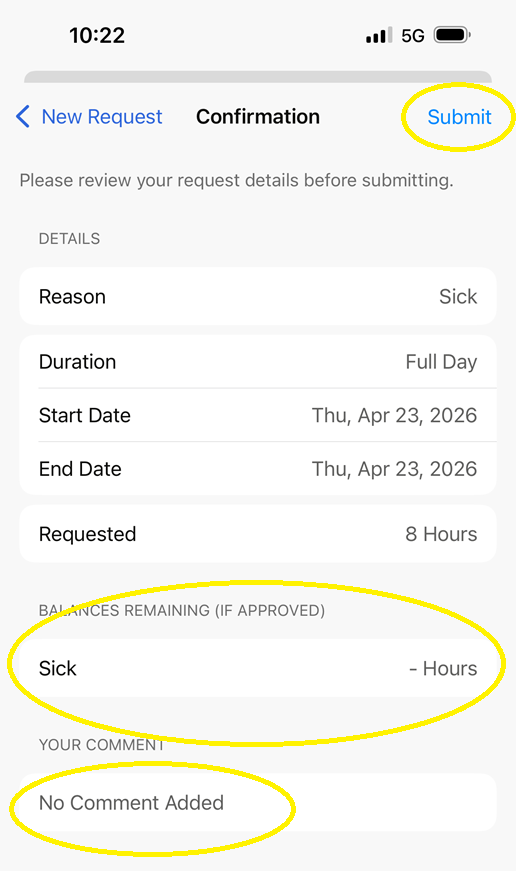
8. Review the details. Input additional comment if needed then click "Submit."
Note: Remaining Balance if approved will show in the screen.
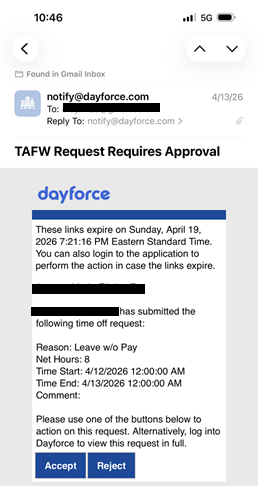
9. Approver will receive an email notification.
View / Print Check Stubs
Option 1: Using Laptop / Desktop
1. Log in to Dayforce at MyDayForce Login
|
Company ID: GDCgroup
|
Username: Firstname.Lastname
|
Password:
|
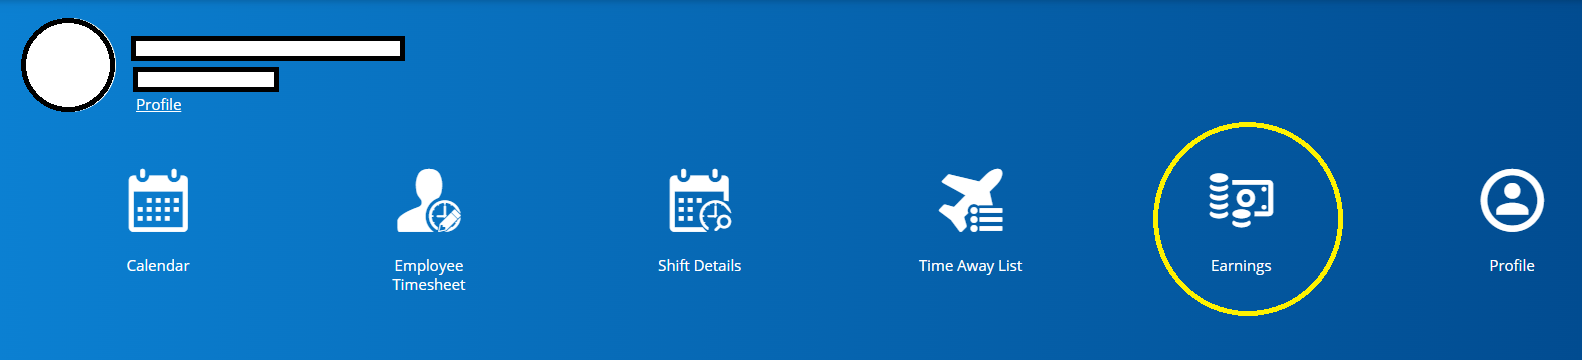
2. Click the "Earnings" icon in the home screen.
3. Click the specific month and choose the specific check stub.
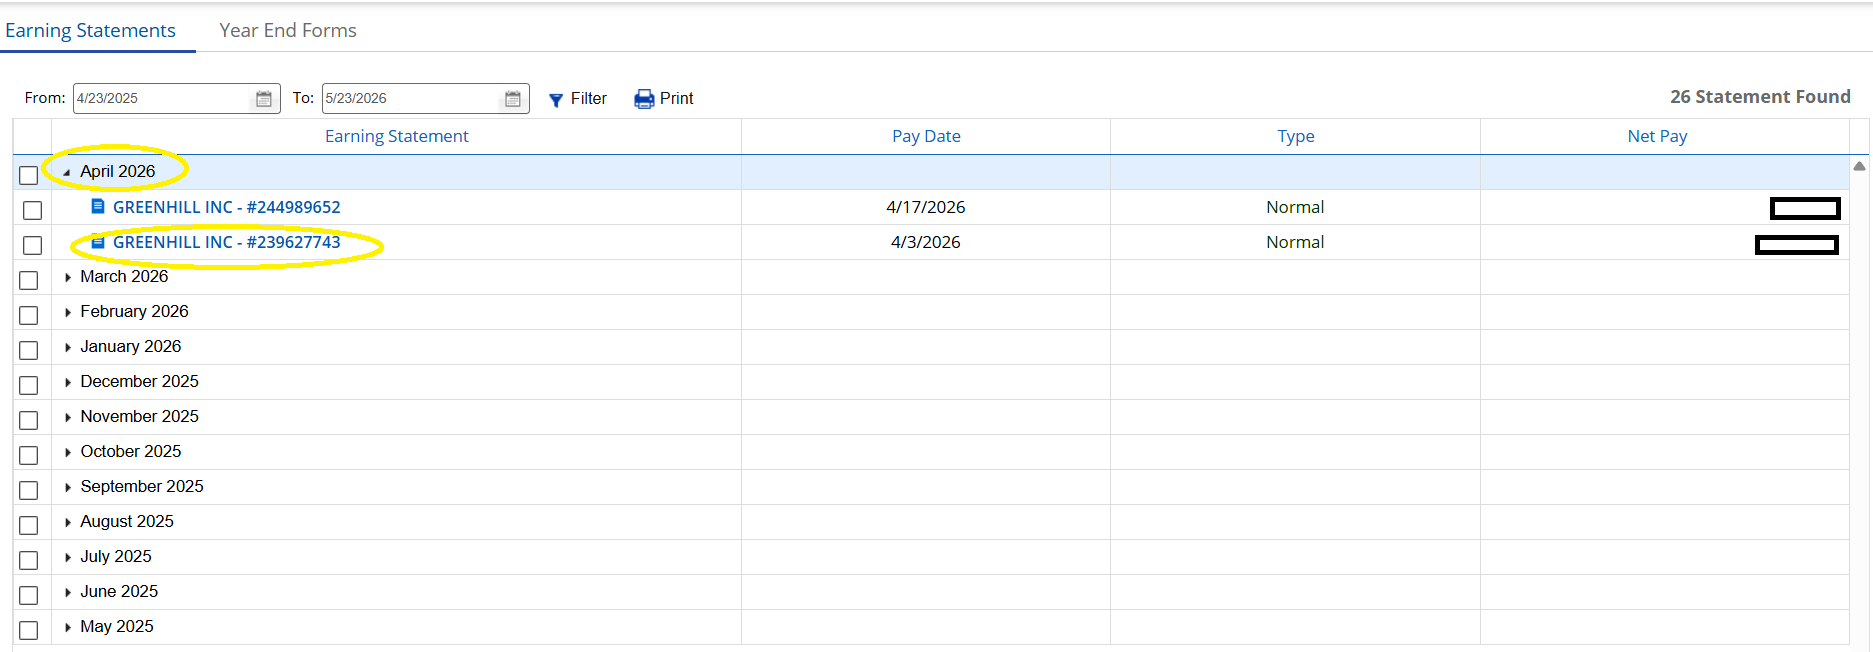
4. Check stub will show on the screen.
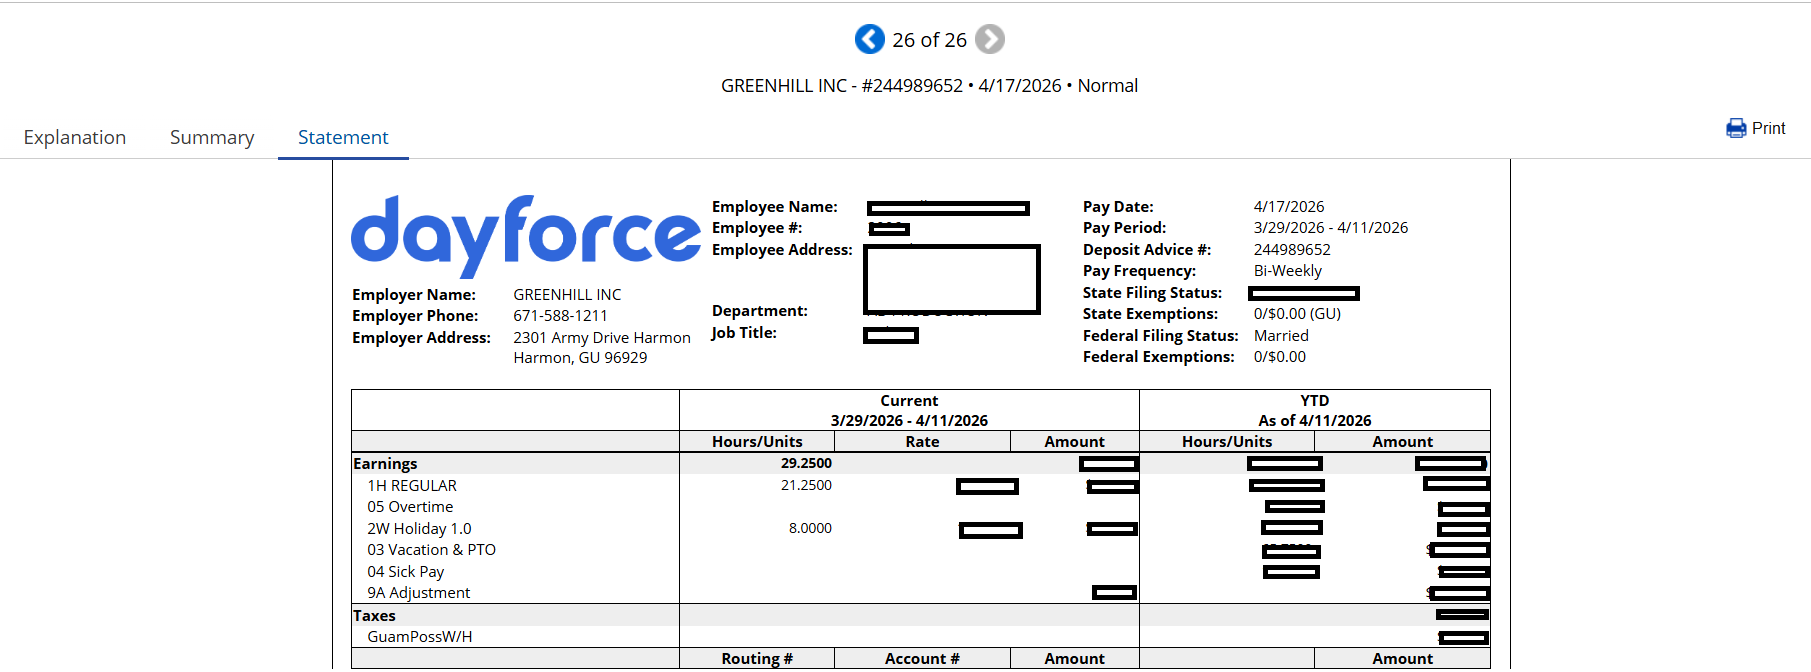
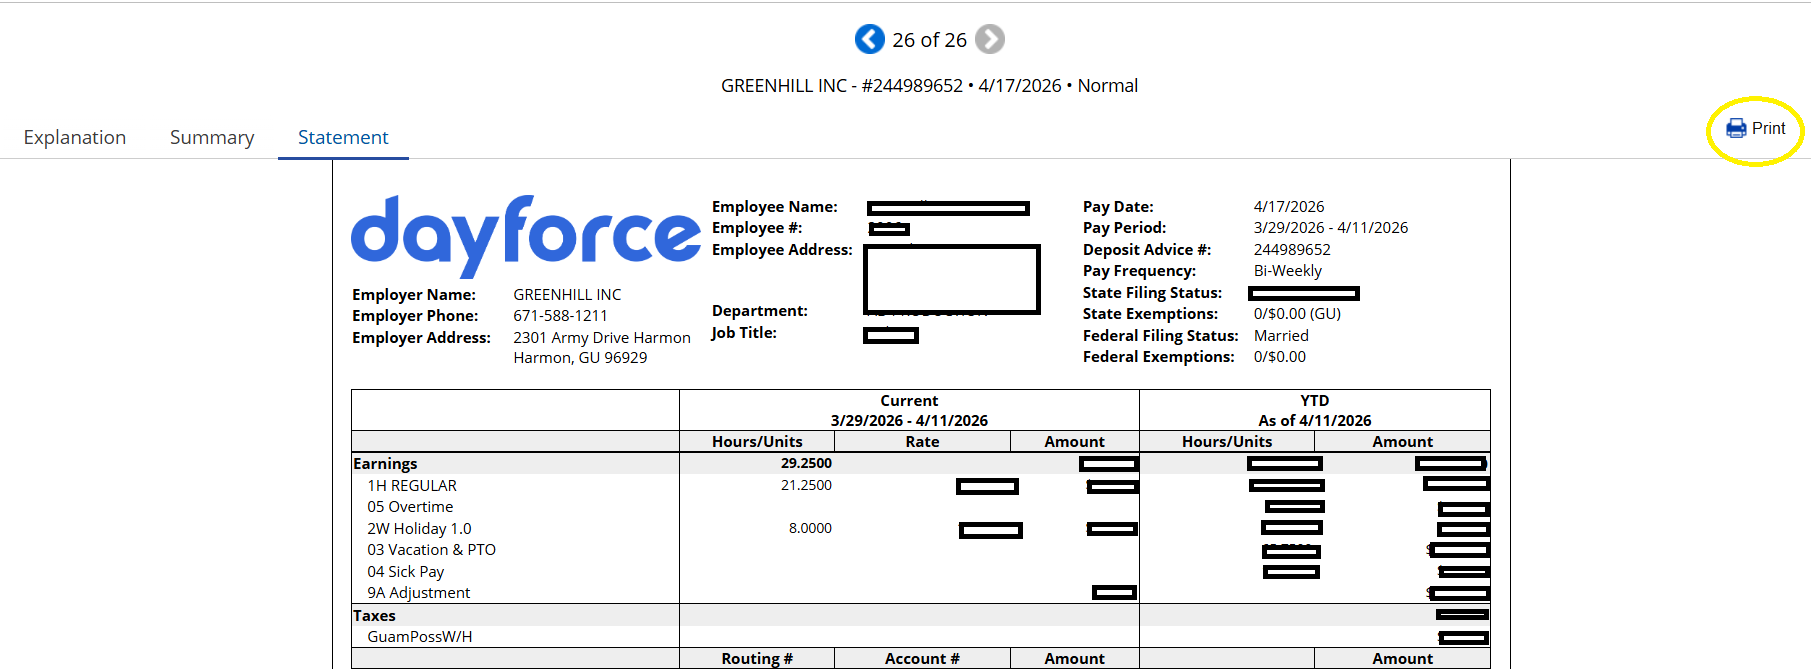
5. To print, click the "Print" icon.
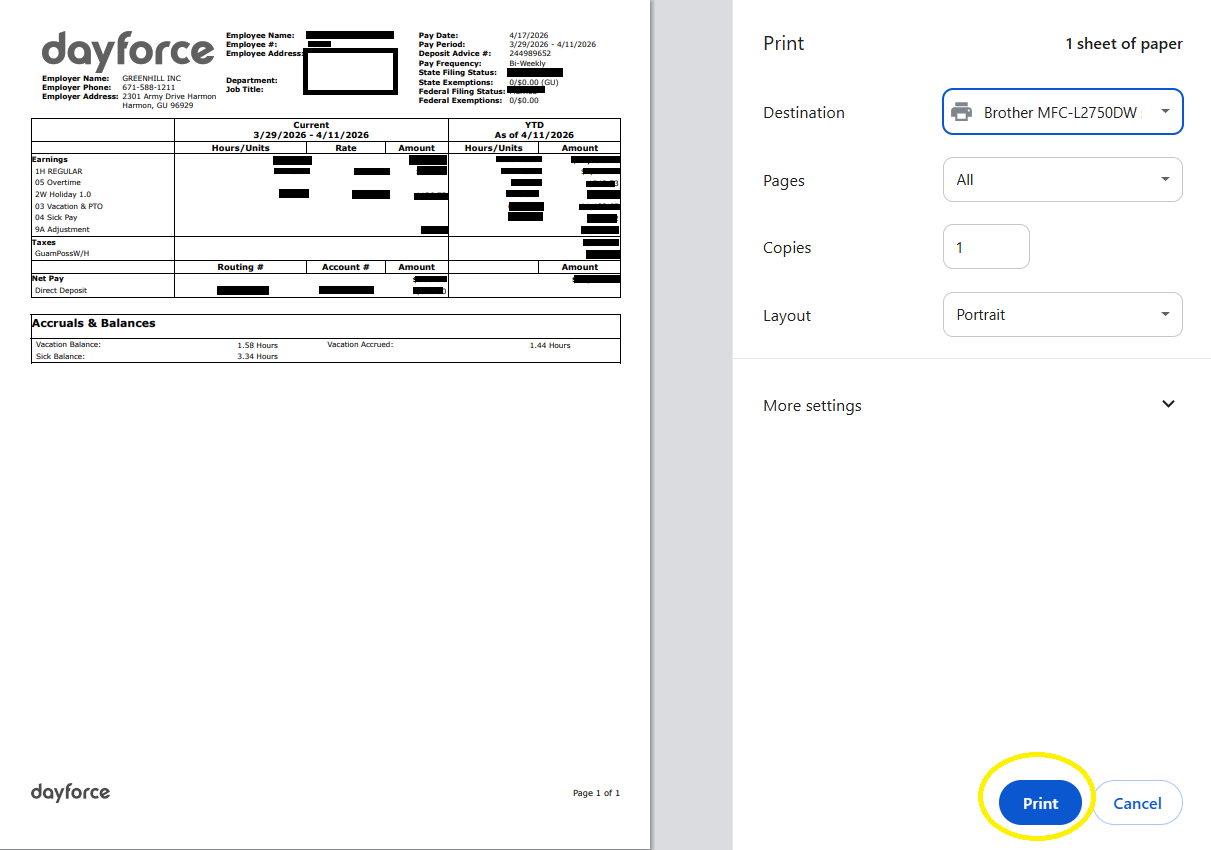
6. Click "Print."
7. To save in PDF, Click "Print", change destination to "Save to PDF" and then click "Save."
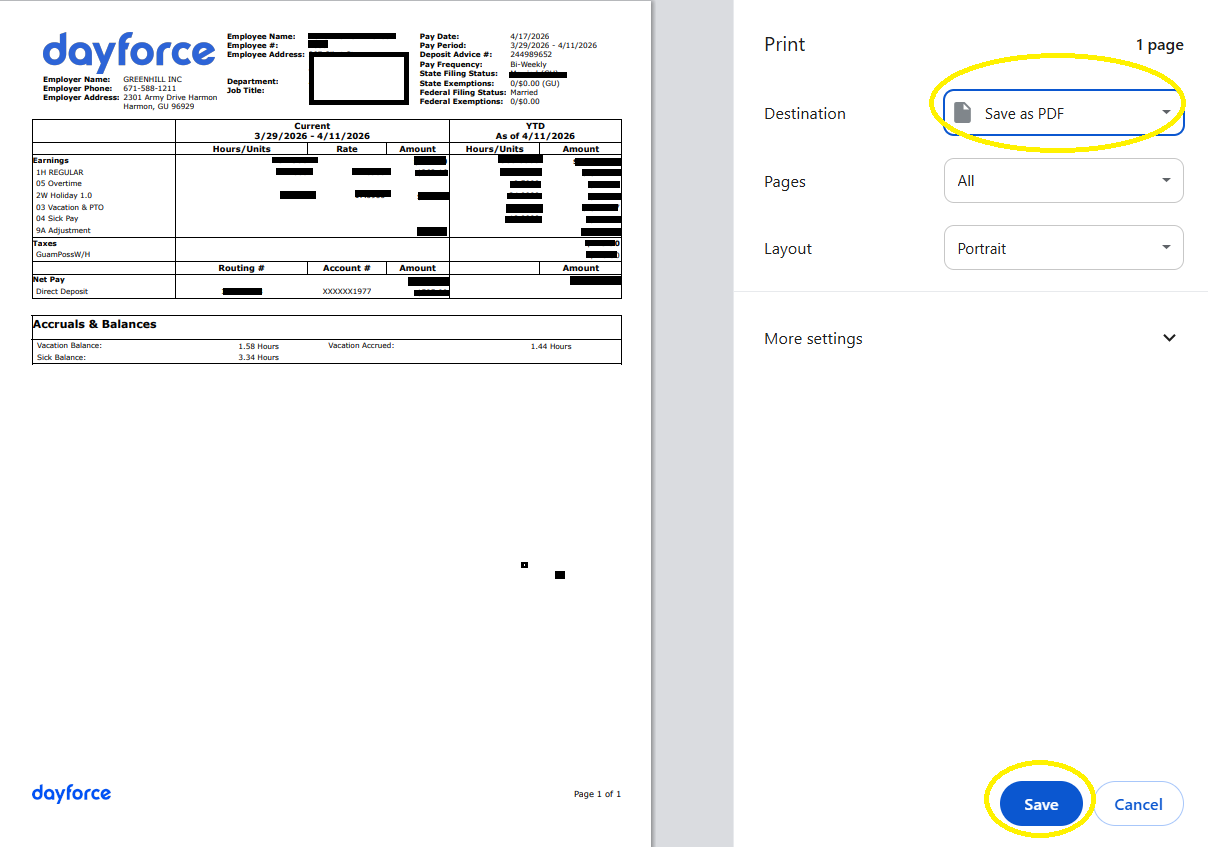
Note. Printing of check stubs can only be done using laptop/desktop.
Option 2: Using Phone Device
- Click the Dayforce application in the phone.
- Click the "GDCgroup" icon.
3. Log in to the account by typing the username and password and then click "Log In."
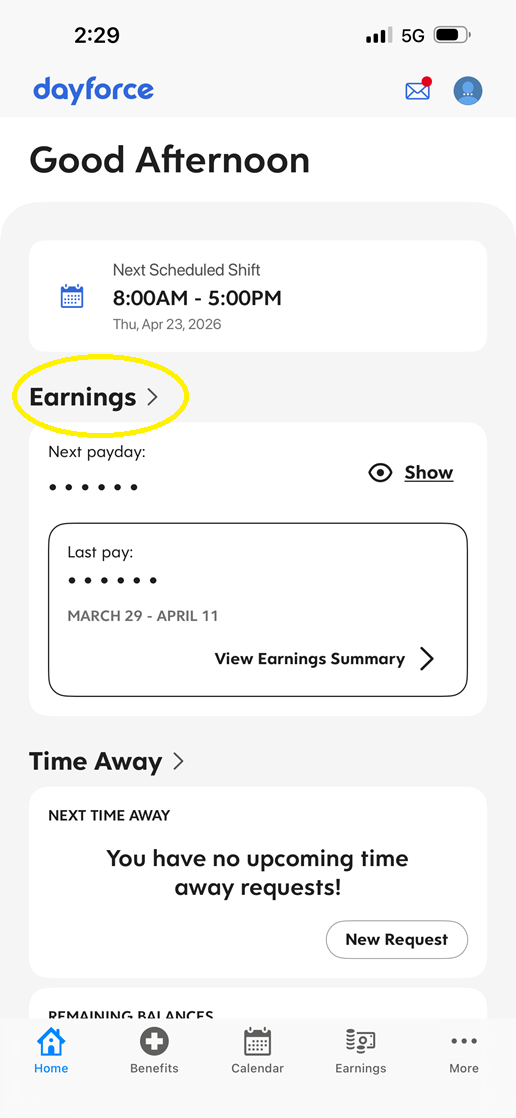
4. On the Home screen, click "Earnings."
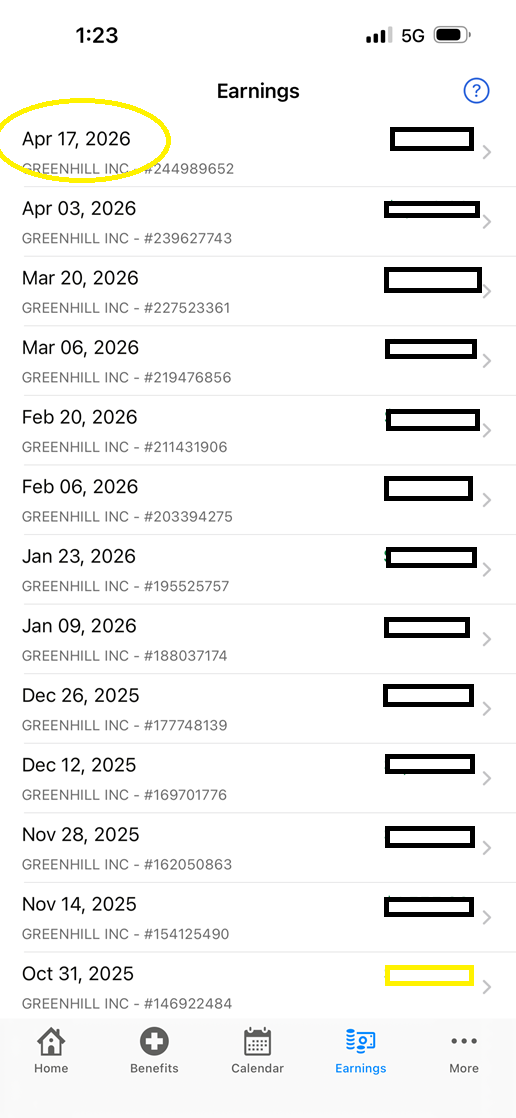
5. Click the specific date to view the check stub,
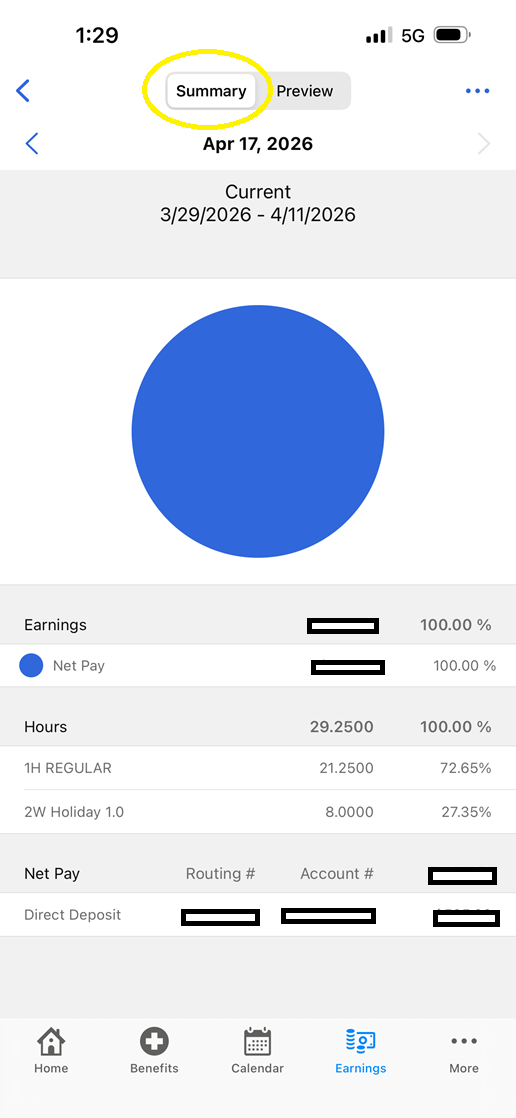
6. Check stub can be viewed through the following:
|
Click "Summary" button
|
Click "Preview" button
|
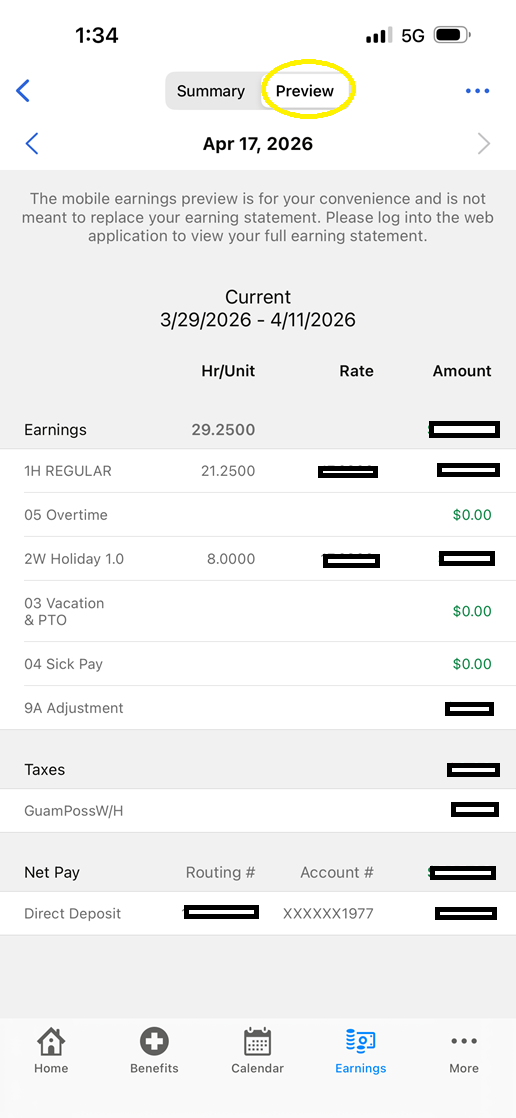
Note: The mobile earnings preview is for employee's convenience and is not meant to replace your earnings statement. Employees can log into the web application to view full earning statement.